|
Wing Commander Secret Ops
COURAGE SYSTEM
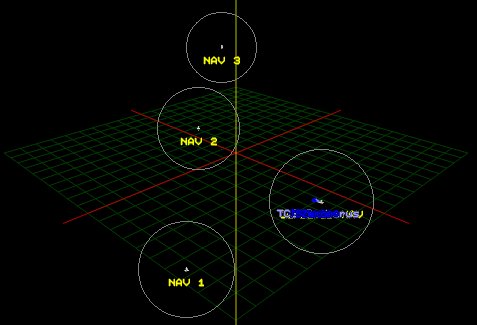
Courage 1 : The Capricious Carrier
|
Primary Objectives
|
Patrol all NAV points
Destroy escaping Moray (added at NAV 2)
|
|
Secondary Objectives
|
None
|
|
Bonus Objectives
|
Eliminate 75% of alien fighters
|
|
Your Ship
|
"Black" Panther
|
|
Wingmen
|
Zero, Maestro
|
|
Other Friendly Ships
|
Bravo wing (Panthers : Spyder (wing leader), Amazon, Stiletto
|
|
Briefing
|
The following information is classified: Your wing will provide close escort and tactical security during Cerberus' maiden voyage. Patrol this route. Cerberus will use your NAV system date to calibrate her jump detection software.
|
NAV 1
Wave 1
4 Moray
Wave 2
3 Moray
2 Stingray
NAV 2
4 Manta
2 Moray
|
|
Notes
- Wave 1 at NAV 1 appears shortly after your wingmen report nothing in the area.
- The Stingrays in the second wave pose little threat as three are required to cluster and they have no missiles, so concentrate on the Morays first.
- The two Morays at NAV 2 immediately run for the jump point. Although you have plenty of time to catch them, you can gain a little extra time by pressing the forward view key (F1) instead of watching the flyby.
Outcome
Success / Failure go to Courage 2
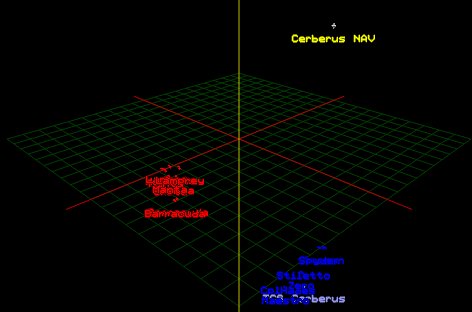
Courage 2 : Scramble / Ambush
Notes
- Engage your booster (B key) as soon as possible right at the start of the mission. If engaged too late, you might ram one of the other ships or fly straight past them all together.
- Leave the Barracudas until the end of the mission. They pose little threat as long as you stay out of their gun sight.
- At the end of the mission, if your wingmen haven't shot the Barracudas down already, you can expend your ordinance on them, or let the Cerberus' BFG do its thing.
Outcome
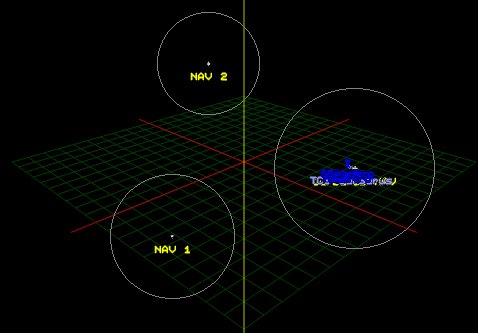
Courage 3a : Straight On Out
|
Primary Objectives
|
Escort Cerberus to the Jump Point
|
|
Secondary Objectives
|
None
|
|
Bonus Objectives
|
Eliminate 75% of alien fighters.
Eliminate 75% of alien bombers.
|
|
Your Ship
|
"Black" Panther
|
|
Wingmen
|
Maestro, Spyder, Zero
|
|
Other Friendly Ships
|
Cerberus
|
|
Briefing
|
An alien presence in this system has been confirmed. To maximize our chances of survival, we must reach the jump to Ella system. Failure will mean being trapped in this system by an unknown number of alien forces. Escort Cerberus to this point. Due to Alpha wing's quick action, we should be able to take a straight and fast path to the jump.
|
NAV 1
3 Moray
4 Skate
NAV 2
Wave 1
2 Manta
2 Red Manta
2 Moray
3 Skate
Wave 2
2 Manta
2 Red Manta
4 Moray
2 Skate
NAV 3
2 Red Manta
6 Moray
|
|
Notes
- The alien wings at NAV 1 aren't much to worry about. If they attack Cerberus, they can only harm its turrets, not its main components. Try not to take any damage here as the battle has only just begun.
- At NAV 2 you will face a total of 19 fighters. Nine fighters start at a jump point, and nine more arrive when about five of the original fighters have been destroyed.
- Remember to try to destroy any Red Mantas before anything else. Your Cerberus can take a lot of damage in this mission, but luckily it doesn't carry over to the next mission.
- If shooting down torpedoes is your style, be careful if you are trying to shoot them down from behind. If too many shots miss the torpedo and hit Cerberus, Confed ships will attack you.
Outcome
Success / Failure go to Courage 4.
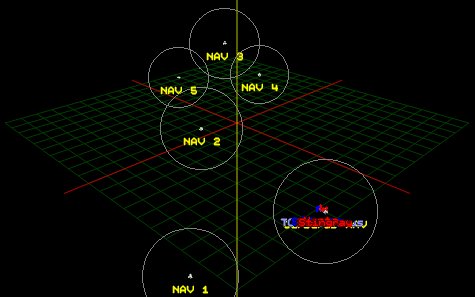
Courage 3b : Long Way Out
Notes
- Bugs. Over 80 of them, including the individual Skates that spawn when you blow up a big one. This mission is a test of endurance for you and your wingmen who are almost definitely going to punch out before the end of the mission.
- You just can't get an advantage in this one. Go for the bombers, and the fighters will attempt to jam several dozen missiles up your tail pipe. Go for the fighters and the Cerberus will be screaming for help in no time. All you can do is try to stay close to the Cerberus using her turrets to your advantage, and attack any Mantas and Devil Rays first. The Devil Rays seem to like picking off turrets while Mantas just try to destroy anything transmitting a Confed signal. Be aware of the Red Mantas at Cerberus NAV, and any Skate Ts though. They each carry one Poseidon torpedo, and if they manage to take out the Cerberus' landing bay, you automatically fail the mission.
- If you make it to NAV 5 in more or less one piece and feel like a challenge, you can always try to knock out all of the turrets on the Hydra. This isn't one of your objectives and it is impossible to actually destroy the whole Hydra (you don't have torpedoes) but feel free to take it as a challenge.
Outcome
Success / Failure go to Courage 4.
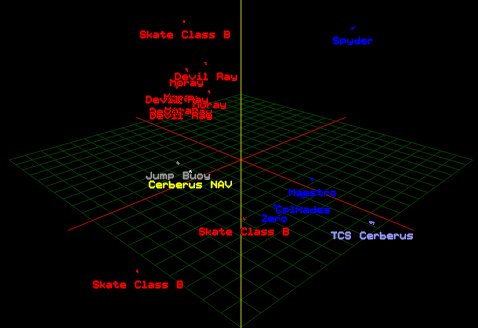
Courage 4 : Visit to Aunt Ella
Notes
- This mission shouldn't be too much of a problem as none of the aliens can launch torpedoes. The plasma cannon on clustered Stingrays can do the damage though, so make sure to break up the clusters ASAP.
- The 8 Devil Rays in this mission will give the Cerberus' turrets serious grief so if you want that little extra help from Cerberus, take out the Devil Rays quick.
Outcome
Success / Failure go to Ella 1.
Comment on a mission
Submitted by : NiteFox
Mission : Courage 1 : The Capricious Carrier
Comments : Maestro talks big, but despite his speech the bugs won't have to worry about him. Save your missiles at Nav 1 and pound on the Morays at Nav 2. If you engage in a dogfight before killing the Morays, then you simply won't have time to catch up.
Submitted by : Commando
Mission : Mission 1
Comments : Well, I do REAL well in this mission. It's a cakewalk. As for catching those two baddies in NAV 2, don't worry too much. If you take too long, your wingmates will get em. Gotta love smart wingmates!
Submitted by : ChazZio
Mission : Mission 2: SCRAMBLE!
Comments : Try to save your salvo missles for taking out the barracudas, and DON'T USE FULL GUNS! Believe me, if you are a poor shot, you'll want that rapid fire cannon you get with the wasp.
|