Holovids - Privateer 2: The Darkening: Difference between revisions
The Terran Knowledge Bank
Bandit LOAF (talk | contribs) |
Bandit LOAF (talk | contribs) No edit summary |
||
| Line 1: | Line 1: | ||
This page links to a complete collection of cutscenes which appeared in [[ | This page links to a complete collection of cutscenes which appeared in [[Wing Commander IV: The Price of Freedom]] as well as a variety of behind the scenes and marketing material. | ||
== Cutscenes == | == Cutscenes == | ||
| Line 9: | Line 9: | ||
{| class="wikitable" width="66%" | {| class="wikitable" width="66%" | ||
|- | |- | ||
!colspan=" | !colspan="2"|Introduction | ||
|- | |- | ||
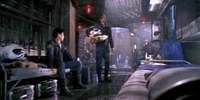
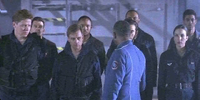
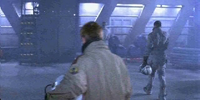
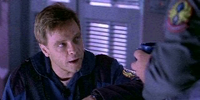
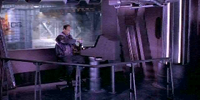
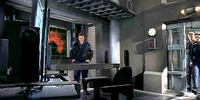
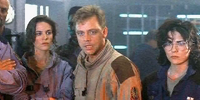
!style="width:200px"|[[File: | !style="width:200px"| [[File:WCIV TITLE DOS.png|200px|link=SC_0010A]] || <B>[[SC_0010A|Space, Great Assembly, Cantina]]</b><br>Bartender: you meet all kinds here; Veteran: buy a vet a drink? | ||
| | |- | ||
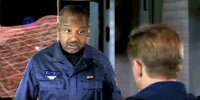
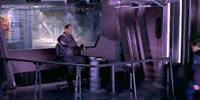
|- | !style="width:200px"| [[File:SC_0010B.png|200px|link=SC_0010B]] || <B>[[SC_0010B|Cantina]]</b><br><i>Help him out.<i> | ||
!style="width:200px"|[[File: | |- | ||
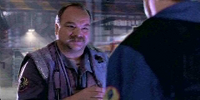
| | !style="width:200px"| [[File:SC_0010C.png|200px|link=SC_0010C]] || <B>[[SC_0010C|Cantina]]</b><br><i>Straighten him out.<i> | ||
|- | |- | ||
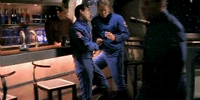
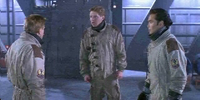
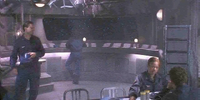
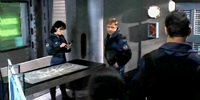
!style="width:200px"|[[File: | !style="width:200px"| [[File:SC_0010D.png|200px|link=SC_0010D]] || <B>[[SC_0010D|Cantina]]</b><br>Maniac: earthworm or an eagle; Seether: shoves a man against a wall | ||
| | |- | ||
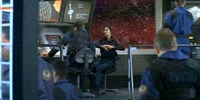
|- | !style="width:200px"| [[File:SC_0010E.png|200px|link=SC_0010E]] || <B>[[SC_0010E|Cantina, Space]]</b><br><i>This pisses me off.<i><br>Maniac: you've been recalled | ||
!style="width:200px"|[[File: | |- | ||
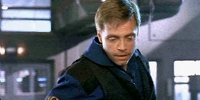
| | !style="width:200px"| [[File:SC_0010F.png|200px|link=SC_0010F]] || <B>[[SC_0010F|Cantina, Space]]</b><br><i>Ain 't my business.<i><br>Maniac: you've been recalled | ||
|- | |- | ||
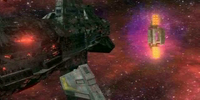
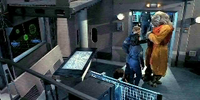
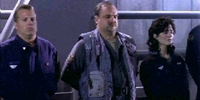
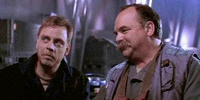
!style="width:200px"| [[File:SC_0200A.png|200px|link=SC_0200A]] || <B>[[SC_0200A|Space, Tolwyn's Office, Flight Deck]]</b><br>Maniac: who was that?; Tolwyn: it's a sign of the times; Maniac: I could tell you, but I’d have to kill you | |||
| | |- | ||
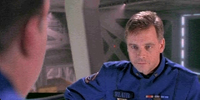
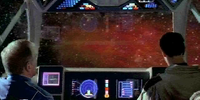
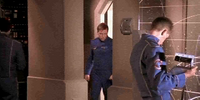
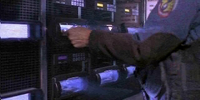
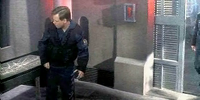
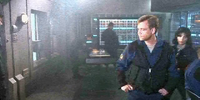
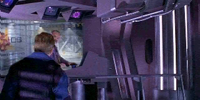
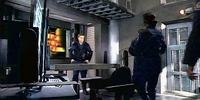
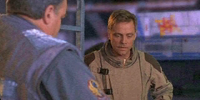
|style="width:200px"|[[File: | !style="width:200px"| [[File:SC_0270A.png|200px|link=SC_0270A]] || <B>[[SC_0270A|Flight Control]]</b><br>Eisen: a few things have changed | ||
| | |- | ||
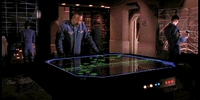
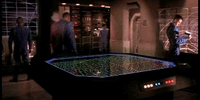
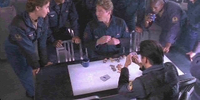
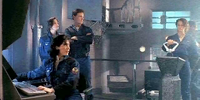
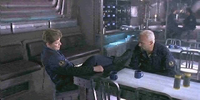
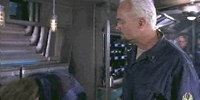
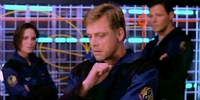
|- | !style="width:200px"| [[File:SC_0280A.png|200px|link=SC_0280A]] || <B>[[SC_0280A|Officer's Lounge]]</b><br>Vagabond: game of cards | ||
!style="width:200px"|[[File: | |- | ||
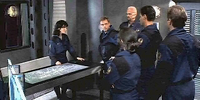
| | !style="width:200px"| [[File:SC_0300A.png|200px|link=SC_0300A]] || <B>[[SC_0300A|Briefing Room]]</b><br>Eisen: briefing | ||
|- | |- | ||
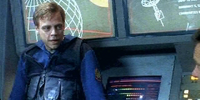
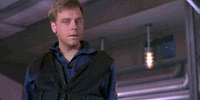
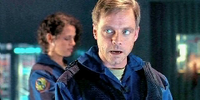
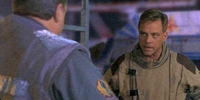
!style="width:200px"| [[File:SC_0340A.png|200px|link=SC_0340A]] || <B>[[SC_0340A|Flight Control]]</b><br>Catscratch: meet Catscratch | |||
|- | |||
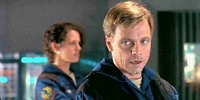
= | !style="width:200px"| [[File:SC_0340B.png|200px|link=SC_0340B]] || <B>[[SC_0340B|Flight Control]]</b><br><i>I like this kid.<i> | ||
|- | |||
!style="width:200px"| [[File:SC_0340C.png|200px|link=SC_0340C]] || <B>[[SC_0340C|Flight Control]]</b><br><i>What's this kid want from me?<i> | |||
|- | |||
!style="width:200px"| [[File:SC_0360A.png|200px|link=SC_0360A]] || <B>[[SC_0360A|Briefing Room]]</b><br>Eisen: mission briefing | |||
|- | |||
!style="width:200px"| [[File:SC_0360B.png|200px|link=SC_0360B]] || <B>[[SC_0360B|Briefing Room]]</b><br>Eisen: mission briefing | |||
|- | |||
!style="width:200px"| [[File:SC_0400A.png|200px|link=SC_0400A]] || <B>[[SC_0400A|Officer's Lounge]]</b><br>Vagabond/Maniac: are Border Worlds behind this? | |||
|- | |||
!style="width:200px"| [[File:SC_0410A.png|200px|link=SC_0410A]] || <B>[[SC_0410A|Briefing Room]]</b><br>Eisen: mission briefing | |||
|- | |||
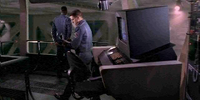
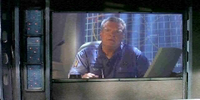
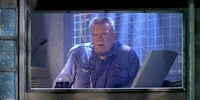
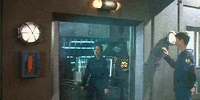
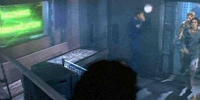
!style="width:200px"| [[File:SC_0480A.png|200px|link=SC_0480A]] || <B>[[SC_0480A|Eisen's Cabin]]</b><br>Eisen: Eisen hides what he's doing on the computer. | |||
|- | |||
!style="width:200px"| [[File:SC_0490A.png|200px|link=SC_0490A]] || <B>[[SC_0490A|Briefing Room]]</b><br>Eisen: mission briefing | |||
|- | |||
!style="width:200px"| [[File:SC_0490B.png|200px|link=SC_0490B]] || <B>[[SC_0490B|Briefing Room]]</b><br>Eisen: mission briefing | |||
|- | |||
!style="width:200px"| [[File:SC_0540A.png|200px|link=SC_0540A]] || <B>[[SC_0540A|Flight Deck]]</b><br>Eisen/Paulsen: orders from Regional Command | |||
|- | |||
!style="width:200px"| [[File:SC_0560A.png|200px|link=SC_0560A]] || <B>[[SC_0560A|Briefing Room]]</b><br>Tolwyn: asks how the situation is via communique | |||
|- | |||
!style="width:200px"| [[File:SC_0570A.png|200px|link=SC_0570A]] || <B>[[SC_0570A|Officer's Lounge]]</b><br>Maniac: female scientist; Catscratch: asks about Paulsen | |||
|- | |||
!style="width:200px"| [[File:SC_0570B.png|200px|link=SC_0570B]] || <B>[[SC_0570B|Officer's Lounge]]</b><br><i>New brass — pain in the ass.<i> | |||
|- | |||
!style="width:200px"| [[File:SC_0570C.png|200px|link=SC_0570C]] || <B>[[SC_0570C|Officer's Lounge]]</b><br><i>Kid asks too many questions.<i> | |||
|- | |||
!style="width:200px"| [[File:SC_0590A.png|200px|link=SC_0590A]] || <B>[[SC_0590A|Briefing Room]]</b><br>Paulsen: where's Eisen, mission briefing | |||
|- | |||
!style="width:200px"| [[File:SC_0620A.png|200px|link=SC_0620A]] || <B>[[SC_0620A|Officer's Lounge, Tolwyn's Office]]</b><br>Maniac: puts the moves on the scientist; Newscast: Union of Border Worlds declares independence | |||
|- | |||
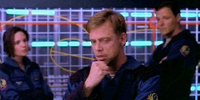
!style="width:200px"| [[File:SC_0640A.png|200px|link=SC_0640A]] || <B>[[SC_0640A|Officer's Lounge]]</b><br>Maniac/Vagabond: debate over newscast | |||
|- | |||
!style="width:200px"| [[File:SC_0640B.png|200px|link=SC_0640B]] || <B>[[SC_0640B|Officer's Lounge]]</b><br><i>Confed’s abusing their authority.<i> | |||
|- | |||
!style="width:200px"| [[File:SC_0640C.png|200px|link=SC_0640C]] || <B>[[SC_0640C|Officer's Lounge]]</b><br><i>Vagabond Confed needs to damp down.<i> | |||
|- | |||
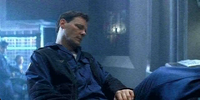
!style="width:200px"| [[File:SC_0650A.png|200px|link=SC_0650A]] || <B>[[SC_0650A|Eisen's Cabin]]</b><br>Eisen: old man's looking forward to new challenges | |||
|- | |||
!style="width:200px"| [[File:SC_0660A.png|200px|link=SC_0660A]] || <B>[[SC_0660A|Briefing Room]]</b><br>Paulsen: mission briefing | |||
|- | |||
!style="width:200px"| [[File:SC_0710A.png|200px|link=SC_0710A]] || <B>[[SC_0710A|Briefing Room]]</b><br>Tolwyn: communique, response to previous comm | |||
|- | |||
!style="width:200px"| [[File:SC_0720A.png|200px|link=SC_0720A]] || <B>[[SC_0720A|Officer's Lounge]]</b><br>Catscratch: he's from the Border Worlds | |||
|- | |||
!style="width:200px"| [[File:SC_0720B.png|200px|link=SC_0720B]] || <B>[[SC_0720B|Officer's Lounge]]</b><br><i>The kids got a point ...<i> | |||
|- | |||
!style="width:200px"| [[File:SC_0720C.png|200px|link=SC_0720C]] || <B>[[SC_0720C|Officer's Lounge]]</b><br><i>Who’s he to question Confed?<i> | |||
|- | |||
!style="width:200px"| [[File:SC_0730A.png|200px|link=SC_0730A]] || <B>[[SC_0730A|Eisen's Cabin]]</b><br>Eisen: our ultimate duty | |||
|- | |||
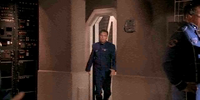
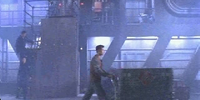
!style="width:200px"| [[File:SC_0740A.png|200px|link=SC_0740A]] || <B>[[SC_0740A|Flight Control]]</b><br>Maniac: invites you to a drink as you are ordered off deck | |||
|- | |||
!style="width:200px"| [[File:SC_0740B.png|200px|link=SC_0740B]] || <B>[[SC_0740B|Flight Control]]</b><br><i>I need to see what’s going on.<i> | |||
|- | |||
!style="width:200px"| [[File:SC_0740C.png|200px|link=SC_0740C]] || <B>[[SC_0740C|Flight Control, Flight Deck]]</b><br><i>I don ’t feel like spending time in the brig.<i> | |||
|- | |||
!style="width:200px"| [[File:SC_0780A.png|200px|link=SC_0780A]] || <B>[[SC_0780A|Officer's Lounge]]</b><br>Maniac: Maniac buys you a drink | |||
|- | |||
!style="width:200px"| [[File:SC_0800A.png|200px|link=SC_0800A]] || <B>[[SC_0800A|Briefing Room]]</b><br>Paulsen: mission briefing. Captain Eisen has stolen a shuttle | |||
|- | |||
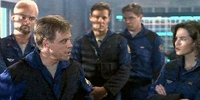
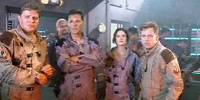
!style="width:200px"| [[File:SC_0890A.png|200px|link=SC_0890A]] || <B>[[SC_0890A|Space, Launch Deck]]</b><br>Panther/Hawk/Eisen: I recognize those names | |||
|- | |||
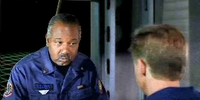
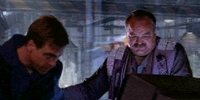
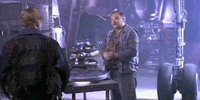
!style="width:200px"| [[File:SC_0970A.png|200px|link=SC_0970A]] || <B>[[SC_0970A|Launch Deck]]</b><br>Pliers: meet Pliers | |||
|- | |||
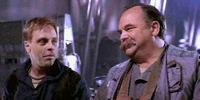
!style="width:200px"| [[File:SC_0970B.png|200px|link=SC_0970B]] || <B>[[SC_0970B|Launch Deck]]</b><br><i>Bet this old coot knows what he ’s doing.<i> | |||
|- | |||
!style="width:200px"| [[File:SC_0970C.png|200px|link=SC_0970C]] || <B>[[SC_0970C|Launch Deck]]</b><br><i>Here s a guy they should have put out to pasture.<i> | |||
|- | |||
!style="width:200px"| [[File:SC_0990A.png|200px|link=SC_0990A]] || <B>[[SC_0990A|Galley]]</b><br>Sosa: Confed's got a lot of skeletons in its lockers | |||
|- | |||
!style="width:200px"| [[File:SC_1000A.png|200px|link=SC_1000A]] || <B>[[SC_1000A|Galley]]</b><br>Maniac: a long, hard road ahead | |||
|- | |||
!style="width:200px"| [[File:SC_1010A.png|200px|link=SC_1010A]] || <B>[[SC_1010A|Chart Room]]</b><br>Eisen/Panther/Hawk: I think this ship needs a captain | |||
|- | |||
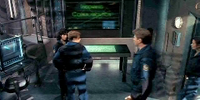
!style="width:200px"| [[File:SC_1020A.png|200px|link=SC_1020A]] || <B>[[SC_1020A|Combat Information Center]]</b><br>Eisen: mission briefing | |||
|- | |||
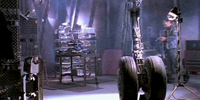
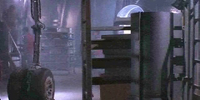
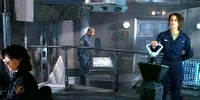
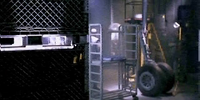
!style="width:200px"| [[File:SC_1080A.png|200px|link=SC_1080A]] || <B>[[SC_1080A|Hangar Bay]]</b><br>Pliers: I stripped your ship for parts | |||
|- | |||
!style="width:200px"| [[File:SC_1080B.png|200px|link=SC_1080B]] || <B>[[SC_1080B|Hangar Bay]]</b><br><i>Well, he is resourceful.<i> | |||
|- | |||
!style="width:200px"| [[File:SC_1080C.png|200px|link=SC_1080C]] || <B>[[SC_1080C|Hangar Bay]]</b><br><i>I knew this guy was trouble.<i> | |||
|- | |||
!style="width:200px"| [[File:SC_1100A.png|200px|link=SC_1100A]] || <B>[[SC_1100A|Storage Hold]]</b><br>Vagabond/Catscratch: I don't know what the rules are anymore | |||
|- | |||
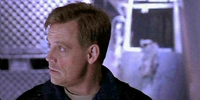
!style="width:200px"| [[File:SC_1110A.png|200px|link=SC_1110A]] || <B>[[SC_1110A|Combat Information Center]]</b><br>Eisen: mission briefing | |||
|- | |||
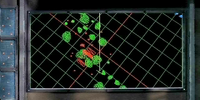
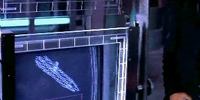
!style="width:200px"| [[File:SC_1200A.png|200px|link=SC_1200A]] || <B>[[SC_1200A|Space]]</b><br>Lexington destroyed. | |||
|- | |||
!style="width:200px"| [[File:SC_1200B.png|200px|link=SC_1200B]] || <B>[[SC_1200B|Space]]</b><br>Lexington disabled. | |||
|- | |||
!style="width:200px"| [[File:SC_1200C.png|200px|link=SC_1200C]] || <B>[[SC_1200C|Shuttle]]</b><br>Seether/Paulsen: you're getting reassigned | |||
|- | |||
!style="width:200px"| [[File:SC_1200D.png|200px|link=SC_1200D]] || <B>[[SC_1200D|Shuttle]]</b><br>Seether/Paulsen: you're getting reassigned | |||
|- | |||
!style="width:200px"| [[File:SC_1210A.png|200px|link=SC_1210A]] || <B>[[SC_1210A|Combat Information Center]]</b><br>Eisen/Sosa: we're going on a scavenger hunt | |||
|- | |||
!style="width:200px"| [[File:SC_1221A.png|200px|link=SC_1221A]] || <B>[[SC_1221A|Galley]]</b><br>Panther: something better to do than killing | |||
|- | |||
!style="width:200px"| [[File:SC_1221B.png|200px|link=SC_1221B]] || <B>[[SC_1221B|Galley]]</b><br><i>Yeah ... You’d think ...<i> | |||
|- | |||
!style="width:200px"| [[File:SC_1221C.png|200px|link=SC_1221C]] || <B>[[SC_1221C|Galley]]</b><br><i>She's dreaming ...<i> | |||
|- | |||
!style="width:200px"| [[File:SC_1230A.png|200px|link=SC_1230A]] || <B>[[SC_1230A|Combat Information Center]]</b><br>Eisen: mission briefing | |||
|- | |||
!style="width:200px"| [[File:SC_1270A.png|200px|link=SC_1270A]] || <B>[[SC_1270A|Hangar Bay]]</b><br>Pliers: Pliers shows his "toys" | |||
|- | |||
!style="width:200px"| [[File:SC_1270B.png|200px|link=SC_1270B]] || <B>[[SC_1270B|Hangar Bay]]</b><br>Pliers: Pliers shows his "toys" | |||
|- | |||
!style="width:200px"| [[File:SC_1270C.png|200px|link=SC_1270C]] || <B>[[SC_1270C|Hangar Bay]]</b><br><i>This thing could be very useful ...<i> | |||
|- | |||
!style="width:200px"| [[File:SC_1270D.png|200px|link=SC_1270D]] || <B>[[SC_1270D|Hangar Bay]]</b><br><i>I can ’t trust this guy.<i> | |||
|- | |||
!style="width:200px"| [[File:SC_1290A.png|200px|link=SC_1290A]] || <B>[[SC_1290A|Galley]]</b><br>Maniac/Vagabond: Vagabond loses card game | |||
|- | |||
!style="width:200px"| [[File:SC_1300A.png|200px|link=SC_1300A]] || <B>[[SC_1300A|Combat Information Center]]</b><br>Hawk: didn't you enjoy blasting cats | |||
|- | |||
!style="width:200px"| [[File:SC_1300B.png|200px|link=SC_1300B]] || <B>[[SC_1300B|Combat Information Center]]</b><br><i>Gotta admit. I did.<i> | |||
|- | |||
!style="width:200px"| [[File:SC_1300C.png|200px|link=SC_1300C]] || <B>[[SC_1300C|Combat Information Center]]</b><br><i>This guy’s bloodthirsty.<i> | |||
|- | |||
!style="width:200px"| [[File:SC_1310A.png|200px|link=SC_1310A]] || <B>[[SC_1310A|Combat Information Center]]</b><br>Eisen: mission briefing | |||
|- | |||
!style="width:200px"| [[File:SC_1330A.png|200px|link=SC_1330A]] || <B>[[SC_1330A|Comm Station]]</b><br>Sosa/Vagabond: see Vagabond get hit | |||
|- | |||
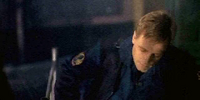
!style="width:200px"| [[File:SC_1360A.png|200px|link=SC_1360A]] || <B>[[SC_1360A|Launch Deck]]</b><br>Blair: Vagabond's funeral (immediately after mission) | |||
|- | |||
!style="width:200px"| [[File:SC_1380A.png|200px|link=SC_1380A]] || <B>[[SC_1380A|Flight Deck]]</b><br>Paulsen/Seether: the traitor will pay | |||
|- | |||
!style="width:200px"| [[File:SC_1390A.png|200px|link=SC_1390A]] || <B>[[SC_1390A|Officer's Lounge]]</b><br>Catscratch: I don't understand it, sir | |||
|- | |||
!style="width:200px"| [[File:SC_1400A.png|200px|link=SC_1400A]] || <B>[[SC_1400A|Briefing Room]]</b><br>Paulsen/Seether: mission briefing | |||
|- | |||
!style="width:200px"| [[File:SC_1440A.png|200px|link=SC_1440A]] || <B>[[SC_1440A|Officer's Lounge]]</b><br>Paulsen: I heard no mention of honor. Captain | |||
|- | |||
!style="width:200px"| [[File:SC_1450A.png|200px|link=SC_1450A]] || <B>[[SC_1450A|Officer's Lounge]]</b><br>Catscratch: Seether has taken over Eisen's cabin | |||
|- | |||
!style="width:200px"| [[File:SC_1450B.png|200px|link=SC_1450B]] || <B>[[SC_1450B|Officer's Lounge]]</b><br><i>What a self-important bastard.<i> | |||
|- | |||
!style="width:200px"| [[File:SC_1450C.png|200px|link=SC_1450C]] || <B>[[SC_1450C|Officer's Lounge]]</b><br><i>Everything's going to hell.<i> | |||
|- | |||
!style="width:200px"| [[File:SC_1460A.png|200px|link=SC_1460A]] || <B>[[SC_1460A|Eisen's Cabin]]</b><br>Seether: we've seen each other | |||
|- | |||
!style="width:200px"| [[File:SC_1470A.png|200px|link=SC_1470A]] || <B>[[SC_1470A|Briefing Room]]</b><br>Paulsen/Seether: mission briefing | |||
|- | |||
!style="width:200px"| [[File:SC_1520A.png|200px|link=SC_1520A]] || <B>[[SC_1520A|Flight Deck]]</b><br>Seethe: who do you think actually runs this ship? | |||
|- | |||
!style="width:200px"| [[File:SC_1550A.png|200px|link=SC_1550A]] || <B>[[SC_1550A|Briefing Room]]</b><br>Paulsen: mission briefing | |||
|- | |||
!style="width:200px"| [[File:SC_1610A.png|200px|link=SC_1610A]] || <B>[[SC_1610A|Launch Deck]]</b><br>Panther/Hawk: I recognize those names | |||
|- | |||
!style="width:200px"| [[File:SC_1620A.png|200px|link=SC_1620A]] || <B>[[SC_1620A|Tolwyn's Office]]</b><br>Tolwyn/Paladin: the great hero has defected | |||
|- | |||
!style="width:200px"| [[File:SC_1630A.png|200px|link=SC_1630A]] || <B>[[SC_1630A|Chart Room]]</b><br>Sosa/Eisen: is comm data what you wanted? | |||
|- | |||
!style="width:200px"| [[File:SC_1640A.png|200px|link=SC_1640A]] || <B>[[SC_1640A|Chart Room]]</b><br>Eisen/Maniac: I tried to blow you both away | |||
|- | |||
!style="width:200px"| [[File:SC_1650A.png|200px|link=SC_1650A]] || <B>[[SC_1650A|Galley]]</b><br>Maniac: aces kept coming my way | |||
|- | |||
!style="width:200px"| [[File:SC_1680A.png|200px|link=SC_1680A]] || <B>[[SC_1680A|Combat Information Center]]</b><br>Eisen: mission briefing | |||
|- | |||
!style="width:200px"| [[File:SC_1720A.png|200px|link=SC_1720A]] || <B>[[SC_1720A|Combat Information Center]]</b><br>Eisen/Melek: we've been harassed by unknown forces | |||
|- | |||
!style="width:200px"| [[File:SC_1740A.png|200px|link=SC_1740A]] || <B>[[SC_1740A|Galley]]</b><br>Panther/Catscratch: is Eisen making the right call? | |||
|- | |||
!style="width:200px"| [[File:SC_1740B.png|200px|link=SC_1740B]] || <B>[[SC_1740B|Galley]]</b><br><i>Straighten this kid out.<i> | |||
|- | |||
!style="width:200px"| [[File:SC_1740C.png|200px|link=SC_1740C]] || <B>[[SC_1740C|Galley]]</b><br><i>Do I look like I have all the answers?<i> | |||
|- | |||
!style="width:200px"| [[File:SC_1750A.png|200px|link=SC_1750A]] || <B>[[SC_1750A|Galley]]</b><br>Melek: what is this word "payback"? | |||
|- | |||
!style="width:200px"| [[File:SC_1760A.png|200px|link=SC_1760A]] || <B>[[SC_1760A|Storage Hold]]</b><br>Hawk: I fought those animals in the war | |||
|- | |||
!style="width:200px"| [[File:SC_1760B.png|200px|link=SC_1760B]] || <B>[[SC_1760B|Storage Hold]]</b><br><i>He’s missing the point ...<i> | |||
|- | |||
!style="width:200px"| [[File:SC_1760C.png|200px|link=SC_1760C]] || <B>[[SC_1760C|Storage Hold]]</b><br><i>Bitter guy.<i> | |||
|- | |||
!style="width:200px"| [[File:SC_1770A.png|200px|link=SC_1770A]] || <B>[[SC_1770A|Combat Information Center]]</b><br>Eisen: he'll be acting commander | |||
|- | |||
!style="width:200px"| [[File:SC_1780A.png|200px|link=SC_1780A]] || <B>[[SC_1780A|Hangar Bay]]</b><br> | |||
|- | |||
!style="width:200px"| [[File:SC_1800A.png|200px|link=SC_1800A]] || <B>[[SC_1800A|Combat Information Center]]</b><br>Blair: mission briefing | |||
|- | |||
!style="width:200px"| [[File:SC_1850A.png|200px|link=SC_1850A]] || <B>[[SC_1850A|Galley]]</b><br>Catscratch/Sosa: I helped straighten him out | |||
|- | |||
!style="width:200px"| [[File:SC_1850B.png|200px|link=SC_1850B]] || <B>[[SC_1850B|Galley]]</b><br>Catscratch/Sosa: I helped straighten him out | |||
|- | |||
!style="width:200px"| [[File:SC_1850C.png|200px|link=SC_1850C]] || <B>[[SC_1850C|Galley]]</b><br>Catscratch/Sosa: I helped straighten him out | |||
|- | |||
!style="width:200px"| [[File:SC_1860A.png|200px|link=SC_1860A]] || <B>[[SC_1860A|Storage Hold]]</b><br>Dekker: we re ready to go to work | |||
|- | |||
!style="width:200px"| [[File:SC_1870A.png|200px|link=SC_1870A]] || <B>[[SC_1870A|Combat Information Center]]</b><br>Blair: mission briefing | |||
|- | |||
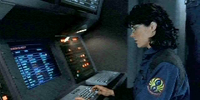
!style="width:200px"| [[File:SC_1901A.png|200px|link=SC_1901A]] || <B>[[SC_1901A|Space, Combat Information Center]]</b><br>Sosa/Maniac: all the screens go dead | |||
|- | |||
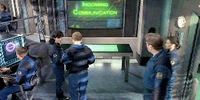
!style="width:200px"| [[File:SC_1990A.png|200px|link=SC_1990A]] || <B>[[SC_1990A|Combat Information Center]]</b><br>Wilford: taped message from Admiral | |||
|- | |||
!style="width:200px"| [[File:SC_2000A.png|200px|link=SC_2000A]] || <B>[[SC_2000A|Control Bay]]</b><br>Pliers: ship advice | |||
|- | |||
!style="width:200px"| [[File:SC_2000B.png|200px|link=SC_2000B]] || <B>[[SC_2000B|Control Bay]]</b><br>Pliers: ship advice | |||
|- | |||
!style="width:200px"| [[File:SC_2040A.png|200px|link=SC_2040A]] || <B>[[SC_2040A|Hangar Bay]]</b><br>Panther/Hawk/Vet: interrogate the prisoner | |||
|- | |||
!style="width:200px"| [[File:SC_2050A.png|200px|link=SC_2050A]] || <B>[[SC_2050A|Hangar Bay]]</b><br>Panther/Hawk/Vet: interrogate the prisoner | |||
|- | |||
!style="width:200px"| [[File:SC_2060A.png|200px|link=SC_2060A]] || <B>[[SC_2060A|Combat Information Center]]</b><br>Blair: mission briefing | |||
|- | |||
!style="width:200px"| [[File:SC_2060B.png|200px|link=SC_2060B]] || <B>[[SC_2060B|Combat Information Center]]</b><br>Blair: mission briefing | |||
|- | |||
!style="width:200px"| [[File:SC_2060C.png|200px|link=SC_2060C]] || <B>[[SC_2060C|Combat Information Center]]</b><br>Blair: mission briefing | |||
|- | |||
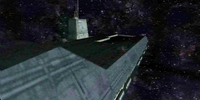
!style="width:200px"| [[File:SC_2080A.png|200px|link=SC_2080A]] || <B>[[SC_2080A|Space Combat Information Center]]</b><br>Dekker: sees spacelab, takes off in his shuttle | |||
|- | |||
!style="width:200px"| [[File:SC_2110A.png|200px|link=SC_2110A]] || <B>[[SC_2110A|Control Bay]]</b><br>Maniac: you'll never believe it | |||
|- | |||
!style="width:200px"| [[File:SC_2120A.png|200px|link=SC_2120A]] || <B>[[SC_2120A|Storage Hold]]</b><br>Tolwyn: am I your prisoner of war | |||
|- | |||
!style="width:200px"| [[File:SC_2120B.png|200px|link=SC_2120B]] || <B>[[SC_2120B|Storage Hold]]</b><br><i>I owe him ...<i> | |||
|- | |||
!style="width:200px"| [[File:SC_2120C.png|200px|link=SC_2120C]] || <B>[[SC_2120C|Storage Hold]]</b><br><i>I owe him nothing.<i> | |||
|- | |||
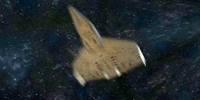
!style="width:200px"| [[File:SC_2130A.png|200px|link=SC_2130A]] || <B>[[SC_2130A|Launch Deck]]</b><br>Tolwyn leaves the Intrepid | |||
|- | |||
!style="width:200px"| [[File:SC_2140A.png|200px|link=SC_2140A]] || <B>[[SC_2140A|Control Bay]]</b><br>Talking to Dekker about Tolwyn | |||
|- | |||
!style="width:200px"| [[File:SC_2160A.png|200px|link=SC_2160A]] || <B>[[SC_2160A|Control Bay]]</b><br>Maniac freed Tolwyn | |||
|- | |||
!style="width:200px"| [[File:SC_2170A.png|200px|link=SC_2170A]] || <B>[[SC_2170A|Combat Information Center]]</b><br>Blair: live feed from Wilford, mission briefing; Hawk/Panther: save innocents or get weapons | |||
|- | |||
!style="width:200px"| [[File:SC_2170B.png|200px|link=SC_2170B]] || <B>[[SC_2170B|Combat Information Center]]</b><br><i>Panther's right.<i> | |||
|- | |||
!style="width:200px"| [[File:SC_2170C.png|200px|link=SC_2170C]] || <B>[[SC_2170C|Combat Information Center]]</b><br><i>Hawk's right.<i> | |||
|- | |||
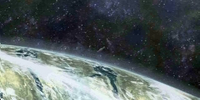
!style="width:200px"| [[File:SC_2180A.png|200px|link=SC_2180A]] || <B>[[SC_2180A|Circe V, Space]]</b><br>Circe V: a fierce ground war is being fought in the trenches | |||
|- | |||
!style="width:200px"| [[File:SC_2220A.png|200px|link=SC_2220A]] || <B>[[SC_2220A|Galley]]</b><br>Maniac/Dekker: I'll kick your ass | |||
|- | |||
!style="width:200px"| [[File:SC_2220B.png|200px|link=SC_2220B]] || <B>[[SC_2220B|Galley]]</b><br><i>Maniac's gonna get creamed.<i> | |||
|- | |||
!style="width:200px"| [[File:SC_2220C.png|200px|link=SC_2220C]] || <B>[[SC_2220C|Galley]]</b><br><i>This I gotta see ...<i> | |||
|- | |||
!style="width:200px"| [[File:SC_2240A.png|200px|link=SC_2240A]] || <B>[[SC_2240A|Combat Information Center]]</b><br>Blair: live feed from Wilford, mission briefing | |||
|- | |||
!style="width:200px"| [[File:SC_2240B.png|200px|link=SC_2240B]] || <B>[[SC_2240B|Combat Information Center]]</b><br>Blair: choose second mission, mission briefing | |||
|- | |||
!style="width:200px"| [[File:SC_2240C.png|200px|link=SC_2240C]] || <B>[[SC_2240C|Combat Information Center]]</b><br>Loading screen | |||
|- | |||
!style="width:200px"| [[File:SC_2240D.png|200px|link=SC_2240D]] || <B>[[SC_2240D|Combat Information Center]]</b><br>Mission selection | |||
|- | |||
!style="width:200px"| [[File:SC_2240E.png|200px|link=SC_2240E]] || <B>[[SC_2240E|Combat Information Center]]</b><br>Mission A briefing | |||
|- | |||
!style="width:200px"| [[File:SC_2240F.png|200px|link=SC_2240F]] || <B>[[SC_2240F|Combat Information Center]]</b><br>Mission C briefing | |||
|- | |||
!style="width:200px"| [[File:SC_2240G.png|200px|link=SC_2240G]] || <B>[[SC_2240G|Combat Information Center]]</b><br>Mission D briefing | |||
|- | |||
!style="width:200px"| [[File:SC_2350A.png|200px|link=SC_2350A]] || <B>[[SC_2350A|Storage Hold]]</b><br>Panther: your friend with the overactive glands | |||
|- | |||
!style="width:200px"| [[File:SC_2350B.png|200px|link=SC_2350B]] || <B>[[SC_2350B|Storage Hold]]</b><br><i>Tempting, but I can t let that happen.<i> | |||
|- | |||
!style="width:200px"| [[File:SC_2350C.png|200px|link=SC_2350C]] || <B>[[SC_2350C|Storage Hold]]</b><br><i>Maniac's on his own.<i> | |||
|- | |||
!style="width:200px"| [[File:SC_2380A.png|200px|link=SC_2380A]] || <B>[[SC_2380A|Galley]]</b><br>Catscratch/Maniac: name on gold watch or coffin | |||
|- | |||
!style="width:200px"| [[File:SC_2390A.png|200px|link=SC_2390A]] || <B>[[SC_2390A|Combat Information Center]]</b><br>Sosa: Circean comm data | |||
|- | |||
!style="width:200px"| [[File:SC_2400A.png|200px|link=SC_2400A]] || <B>[[SC_2400A|Combat Information Center]]</b><br>Blair: mission briefing | |||
|- | |||
!style="width:200px"| [[File:SC_2470A.png|200px|link=SC_2470A]] || <B>[[SC_2470A|Hangar Bay]]</b><br>Maniac/Catscratch: you saved my life | |||
|- | |||
!style="width:200px"| [[File:SC_2470B.png|200px|link=SC_2470B]] || <B>[[SC_2470B|Hangar Bay]]</b><br>Warning Maniac about Panther | |||
|- | |||
!style="width:200px"| [[File:SC_2470C.png|200px|link=SC_2470C]] || <B>[[SC_2470C|Hangar Bay]]</b><br>Warning Maniac about Hawk | |||
|- | |||
!style="width:200px"| [[File:SC_2470D.png|200px|link=SC_2470D]] || <B>[[SC_2470D|Hangar Bay]]</b><br>Catscratch is grounded. | |||
|- | |||
!style="width:200px"| [[File:SC_2480A.png|200px|link=SC_2480A]] || <B>[[SC_2480A|Hangar Bay]]</b><br>Blair: Catscratch's funeral | |||
|- | |||
!style="width:200px"| [[File:SC_2490A.png|200px|link=SC_2490A]] || <B>[[SC_2490A|Control Bay]]</b><br>Pliers: you wanna try my new cloaker? | |||
|- | |||
!style="width:200px"| [[File:SC_2490B.png|200px|link=SC_2490B]] || <B>[[SC_2490B|Control Bay]]</b><br><i>Who needs wingmen?<i> | |||
|- | |||
!style="width:200px"| [[File:SC_2490C.png|200px|link=SC_2490C]] || <B>[[SC_2490C|Control Bay]]</b><br><i>I prefer a wingman.<i> | |||
|- | |||
!style="width:200px"| [[File:SC_2500A.png|200px|link=SC_2500A]] || <B>[[SC_2500A|Galley]]</b><br>Sosa: it will make you feel better | |||
|- | |||
!style="width:200px"| [[File:SC_2500B.png|200px|link=SC_2500B]] || <B>[[SC_2500B|Galley]]</b><br>Sosa: it will make you feel better | |||
|- | |||
!style="width:200px"| [[File:SC_2510A.png|200px|link=SC_2510A]] || <B>[[SC_2510A|Combat Information Center]]</b><br>Panther/Hawk: how long since Eisen left | |||
|- | |||
!style="width:200px"| [[File:SC_2510B.png|200px|link=SC_2510B]] || <B>[[SC_2510B|Combat Information Center]]</b><br><i>There's always hope ...<i> | |||
|- | |||
!style="width:200px"| [[File:SC_2510C.png|200px|link=SC_2510C]] || <B>[[SC_2510C|Combat Information Center]]</b><br><i>We die trying ...<i> | |||
|- | |||
!style="width:200px"| [[File:SC_2520A.png|200px|link=SC_2520A]] || <B>[[SC_2520A|Combat Information Center]]</b><br>Blair: mission briefing | |||
|- | |||
!style="width:200px"| [[File:SC_2520B.png|200px|link=SC_2520B]] || <B>[[SC_2520B|Combat Information Center]]</b><br><i>Shut down the supply line.<i> | |||
|- | |||
!style="width:200px"| [[File:SC_2520C.png|200px|link=SC_2520C]] || <B>[[SC_2520C|Combat Information Center]]</b><br><i>Send Dekker in.<i> | |||
|- | |||
!style="width:200px"| [[File:SC_2530A.png|200px|link=SC_2530A]] || <B>[[SC_2530A|Combat Information Center]]</b><br>Blair: mission briefing | |||
|- | |||
!style="width:200px"| [[File:SC_2540A.png|200px|link=SC_2540A]] || <B>[[SC_2540A|Combat Information Center]]</b><br>Blair: mission briefing | |||
|- | |||
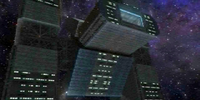
!style="width:200px"| [[File:SC_2570A.png|200px|link=SC_2570A]] || <B>[[SC_2570A|Space]]</b><br>Shipyard shot of busy Confederation Shipyard | |||
|- | |||
!style="width:200px"| [[File:SC_2600A.png|200px|link=SC_2600A]] || <B>[[SC_2600A|Combat Information Center]]</b><br>Blair: mission briefing | |||
|- | |||
!style="width:200px"| [[File:SC_2600B.png|200px|link=SC_2600B]] || <B>[[SC_2600B|Combat Information Center]]</b><br>Blair: mission briefing | |||
|- | |||
!style="width:200px"| [[File:SC_2600C.png|200px|link=SC_2600C]] || <B>[[SC_2600C|Combat Information Center]]</b><br>Blair: mission briefing | |||
|- | |||
!style="width:200px"| [[File:SC_2600D.png|200px|link=SC_2600D]] || <B>[[SC_2600D|Combat Information Center]]</b><br>Blair: mission briefing | |||
|- | |||
!style="width:200px"| [[File:SC_2600E.png|200px|link=SC_2600E]] || <B>[[SC_2600E|Combat Information Center]]</b><br>Blair: mission briefing | |||
|- | |||
!style="width:200px"| [[File:SC_2600F.png|200px|link=SC_2600F]] || <B>[[SC_2600F|Combat Information Center]]</b><br>Blair: mission briefing | |||
|- | |||
!style="width:200px"| [[File:SC_2600G.png|200px|link=SC_2600G]] || <B>[[SC_2600G|Combat Information Center]]</b><br>Blair: mission briefing | |||
|- | |||
!style="width:200px"| [[File:SC_2690A.png|200px|link=SC_2690A]] || <B>[[SC_2690A|Storage Hold]]</b><br>Hawk: your friend's really pissing me off | |||
|- | |||
!style="width:200px"| [[File:SC_2690B.png|200px|link=SC_2690B]] || <B>[[SC_2690B|Storage Hold]]</b><br><i>Time to be a captain.<i> | |||
|- | |||
!style="width:200px"| [[File:SC_2690C.png|200px|link=SC_2690C]] || <B>[[SC_2690C|Storage Hold]]</b><br><i>What a whiner.<i> | |||
|- | |||
!style="width:200px"| [[File:SC_2710A.png|200px|link=SC_2710A]] || <B>[[SC_2710A|Combat Information Center]]</b><br>Blair: mission briefing | |||
|- | |||
!style="width:200px"| [[File:SC_2740A.png|200px|link=SC_2740A]] || <B>[[SC_2740A|Control Bay]]</b><br>Pliers: want extra punch? | |||
|- | |||
!style="width:200px"| [[File:SC_2740B.png|200px|link=SC_2740B]] || <B>[[SC_2740B|Control Bay]]</b><br>Pliers: want extra punch? | |||
|- | |||
!style="width:200px"| [[File:SC_2740C.png|200px|link=SC_2740C]] || <B>[[SC_2740C|Control Bay]]</b><br><i>I could use the extra firepower.<i> | |||
|- | |||
!style="width:200px"| [[File:SC_2740D.png|200px|link=SC_2740D]] || <B>[[SC_2740D|Control Bay]]</b><br><i>I got a need for speed.<i> | |||
|- | |||
!style="width:200px"| [[File:SC_2750A.png|200px|link=SC_2750A]] || <B>[[SC_2750A|Combat Information Center]]</b><br>Blair: mission briefing | |||
|- | |||
!style="width:200px"| [[File:SC_2750B.png|200px|link=SC_2750B]] || <B>[[SC_2750B|Combat Information Center]]</b><br><i>Collect weapons.<i> | |||
|- | |||
!style="width:200px"| [[File:SC_2750C.png|200px|link=SC_2750C]] || <B>[[SC_2750C|Combat Information Center]]</b><br><i>Collect fighters.<i> | |||
|- | |||
!style="width:200px"| [[File:SC_2760A.png|200px|link=SC_2760A]] || <B>[[SC_2760A|Combat Information Center]]</b><br>Blair: mission briefing | |||
|- | |||
!style="width:200px"| [[File:SC_2790A.png|200px|link=SC_2790A]] || <B>[[SC_2790A|Hangar Bay]]</b><br>Pliers: what the heck is this | |||
|- | |||
!style="width:200px"| [[File:SC_2800A.png|200px|link=SC_2800A]] || <B>[[SC_2800A|Hangar Bay]]</b><br>Pliers: I ain’t gonna cannibalize these babies | |||
|- | |||
!style="width:200px"| [[File:SC_2800B.png|200px|link=SC_2800B]] || <B>[[SC_2800B|Hangar Bay]]</b><br><i>Let me at these babies.<i> | |||
|- | |||
!style="width:200px"| [[File:SC_2800C.png|200px|link=SC_2800C]] || <B>[[SC_2800C|Hangar Bay]]</b><br><i>They could be death-traps.<i> | |||
|- | |||
!style="width:200px"| [[File:SC_2840A.png|200px|link=SC_2840A]] || <B>[[SC_2840A|Combat Information Center]]</b><br>Sosa: something terrible has happened on FT957 | |||
|- | |||
!style="width:200px"| [[File:SC_2850A.png|200px|link=SC_2850A]] || <B>[[SC_2850A|Combat Information Center]]</b><br>Blair: mission briefing | |||
|- | |||
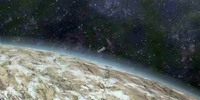
!style="width:200px"| [[File:SC_2900A.png|200px|link=SC_2900A]] || <B>[[SC_2900A|Space]]</b><br>Planet FT957: the genetic ax | |||
|- | |||
!style="width:200px"| [[File:SC_2900B.png|200px|link=SC_2900B]] || <B>[[SC_2900B|Space]]</b><br>Planet FT957: the genetic ax | |||
|- | |||
!style="width:200px"| [[File:SC_2900C.png|200px|link=SC_2900C]] || <B>[[SC_2900C|Telamon]]</b><br>Planet FT957: the genetic ax | |||
|- | |||
!style="width:200px"| [[File:SC_2900D.png|200px|link=SC_2900D]] || <B>[[SC_2900D|Space]]</b><br>Planet FT957: the genetic ax | |||
|- | |||
!style="width:200px"| [[File:SC_2900E.png|200px|link=SC_2900E]] || <B>[[SC_2900E|Space]]</b><br>Planet FT957: the genetic ax | |||
|- | |||
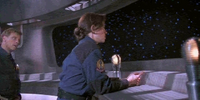
!style="width:200px"| [[File:SC_2930A.png|200px|link=SC_2930A]] || <B>[[SC_2930A|Storage Hold]]</b><br>Sosa: light a candle | |||
|- | |||
!style="width:200px"| [[File:SC_2940A.png|200px|link=SC_2940A]] || <B>[[SC_2940A|Combat Information Center]]</b><br>Maniac: message from Admiral Wilford | |||
|- | |||
!style="width:200px"| [[File:SC_2950A.png|200px|link=SC_2950A]] || <B>[[SC_2950A|Combat Information Center]]</b><br>Blair: mission briefing | |||
|- | |||
!style="width:200px"| [[File:SC_2970A.png|200px|link=SC_2970A]] || <B>[[SC_2970A|Axius]]</b><br>Tolwyn/Seether: meet the Black Lance; Brody: I know a way | |||
|- | |||
!style="width:200px"| [[File:SC_3200A.png|200px|link=SC_3200A]] || <B>[[SC_3200A|Space, Vesuvius Bridge]]</b><br>Seether/Tolwyn: there has been a security breach | |||
|- | |||
!style="width:200px"| [[File:SC_3220A.png|200px|link=SC_3220A]] || <B>[[SC_3220A|Control Bay]]</b><br>Dekker/Pliers: what did you find? | |||
|- | |||
!style="width:200px"| [[File:SC_3230A.png|200px|link=SC_3230A]] || <B>[[SC_3230A|Combat Information Center]]</b><br>Panther/Hawk: should we use the Flash-pak ? | |||
|- | |||
!style="width:200px"| [[File:SC_3230B.png|200px|link=SC_3230B]] || <B>[[SC_3230B|Combat Information Center]]</b><br><i>Panther's right. We can't kill civilians.<i> | |||
|- | |||
!style="width:200px"| [[File:SC_3230C.png|200px|link=SC_3230C]] || <B>[[SC_3230C|Combat Information Center]]</b><br><i>Hawk's right. This is war.<i> | |||
|- | |||
!style="width:200px"| [[File:SC_3240A.png|200px|link=SC_3240A]] || <B>[[SC_3240A|Combat Information Center]]</b><br>Blair: mission briefing | |||
|- | |||
!style="width:200px"| [[File:SC_3250A.png|200px|link=SC_3250A]] || <B>[[SC_3250A|Combat Information Center]]</b><br>Blair: mission briefing | |||
|- | |||
!style="width:200px"| [[File:SC_3300A.png|200px|link=SC_3300A]] || <B>[[SC_3300A|Space]]</b><br>Ella destroyed. | |||
|- | |||
!style="width:200px"| [[File:SC_3300B.png|200px|link=SC_3300B]] || <B>[[SC_3300B|Space]]</b><br>Ella avoided. | |||
|- | |- | ||
! | !style="width:200px"| [[File:SC_3330A.png|200px|link=SC_3330A]] || <B>[[SC_3330A|Space, Combat Information Center, Vesuvius Bridge]]</b><br>Tolwyn: the Intrepid is closing in; Sosa: he's turning around | ||
| | |||
|- | |- | ||
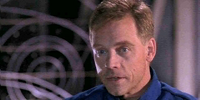
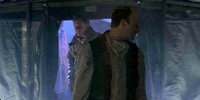
!style="width:200px"| [[File:SC_3370A.png|200px|link=SC_3370A]] || <B>[[SC_3370A|Space, Combat Information Center]]</b><br>Eisen: mission briefing (via hologram) | |||
|- | |- | ||
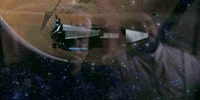
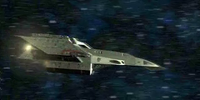
!style="width:200px"| [[File:SC_3410A.png|200px|link=SC_3410A]] || <B>[[SC_3410A|Space]]</b><br>Jump to Sol | |||
|- | |- | ||
! | !style="width:200px"| [[File:SC_3410B.png|200px|link=SC_3410B]] || <B>[[SC_3410B|Hangar Bay]]</b><br>Pliers: I can rig the Flash-pak | ||
|- | |- | ||
!style="width:200px"| [[File:SC_3410C.png|200px|link=SC_3410C]] || <B>[[SC_3410C|Hangar Bay]]</b><br><i>Its now or never.<i> | |||
| | |||
|- | |- | ||
!style="width:200px"| [[File:SC_3410D.png|200px|link=SC_3410D]] || <B>[[SC_3410D|Hangar Bay]]</b><br><i>Too risky.<i> | |||
| | |||
|- | |- | ||
!style="width:200px"| [[File:SC_3440A.png|200px|link=SC_3440A]] || <B>[[SC_3440A|Combat Information Center, Vesuvius Bridge]]</b><br>Tolwyn: I'm the one who's invincible (via hologram) | |||
| | |||
|- | |- | ||
!style="width:200px"| [[File:SC_3460A.png|200px|link=SC_3460A]] || <B>[[SC_3460A|Combat Information Center]]</b><br>Eisen: mission briefing (via hologram) | |||
| | |||
|- | |- | ||
!style="width:200px"| [[File:SC_3460B.png|200px|link=SC_3460B]] || <B>[[SC_3460B|Combat Information Center]]</b><br>Eisen: mission briefing (via hologram) | |||
| | |||
|- | |- | ||
!style="width:200px"| [[File:SC_3460C.png|200px|link=SC_3460C]] || <B>[[SC_3460C|Combat Information Center]]</b><br>Eisen: mission briefing (via hologram) | |||
|- | |- | ||
!style="width:200px"| [[File:SC_3490A.png|200px|link=SC_3490A]] || <B>[[SC_3490A|Combat Information Center]]</b><br>Eisen: mission briefing | |||
|- | |- | ||
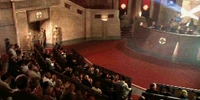
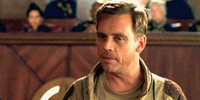
! | !style="width:200px"| [[File:SC_3510A.png|200px|link=SC_3510A]] || <B>[[SC_3510A|The Great Assembly, Space]]</b><br>Tolwyn: If there is a cancer amongst us, let us cut it out. | ||
| | |||
|- | |- | ||
!style="width:200px"| [[File:SC_3510B.png|200px|link=SC_3510B]] || <B>[[SC_3510B|The Great Assembly]]</b><br><i>Seize the moment.<i> | |||
|- | |- | ||
!style="width:200px"| [[File:SC_3510C.png|200px|link=SC_3510C]] || <B>[[SC_3510C|The Great Assembly]]</b><br><i>Careful. Fools rush in ...<i> | |||
|- | |- | ||
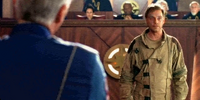
! | !style="width:200px"| [[File:SC_3510D.png|200px|link=SC_3510D]] || <B>[[SC_3510D|The Great Assembly]]</b><br>Tolwyn: Do you really believe that this chamber is that ignorant? | ||
|- | |- | ||
!style="width:200px"| [[File:SC_3510E.png|200px|link=SC_3510E]] || <B>[[SC_3510E|The Great Assembly]]</b><br><i>You're not sucking me in.<i> | |||
|- | |- | ||
!style="width:200px"| [[File:SC_3510F.png|200px|link=SC_3510F]] || <B>[[SC_3510F|The Great Assembly]]</b><br><i>Two can play that game.<i> | |||
|- | |- | ||
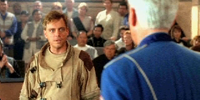
!style="width:200px"| [[File:SC_3510G.png|200px|link=SC_3510G]] || <B>[[SC_3510G|The Great Assembly]]</b><br>Tolwyn: Please continue. Colonel. | |||
!style="width:200px"|[[File: | |||
| | |||
|- | |- | ||
!style="width:200px"| [[File:SC_3510H.png|200px|link=SC_3510H]] || <B>[[SC_3510H|The Great Assembly]]</b><br><i>Dance around him ...<i> | |||
!style="width:200px"|[[File: | |||
| | |||
|- | |- | ||
!style="width:200px"| [[File:SC_3510I.png|200px|link=SC_3510I]] || <B>[[SC_3510I|The Great Assembly]]</b><br><i>Confront him.<i> | |||
!style="width:200px"|[[File: | |||
| | |||
|- | |- | ||
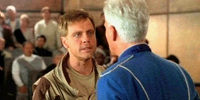
!style="width:200px"| [[File:SC_3510J.png|200px|link=SC_3510J]] || <B>[[SC_3510J|The Great Assembly]]</b><br>Tolwyn: Harmony is maintained through control. | |||
!style="width:200px"|[[File: | |||
| | |||
|- | |- | ||
!style="width:200px"| [[File:SC_3510K.png|200px|link=SC_3510K]] || <B>[[SC_3510K|The Great Assembly]]</b><br><i>He'll trip himself up.<i> | |||
!style="width:200px"|[[File: | |||
| | |||
|- | |- | ||
!style="width:200px"| [[File:SC_3510L.png|200px|link=SC_3510L]] || <B>[[SC_3510L|The Great Assembly]]</b><br><i>He's power mad.<i> | |||
!style="width:200px"|[[File: | |||
| | |||
|- | |- | ||
!style="width:200px"| [[File:SC_3510M.png|200px|link=SC_3510M]] || <B>[[SC_3510M|The Great Assembly]]</b><br>Paladin (to Tolwyn): What are these "Black Lance" forces he's referring to? | |||
|- | |- | ||
!style="width:200px"| [[File:SC_3510N.png|200px|link=SC_3510N]] || <B>[[SC_3510N|The Great Assembly]]</b><br>Winning | |||
!style="width:200px"|[[File: | |||
| | |||
|- | |- | ||
!style="width:200px"| [[File:SC_3510O.png|200px|link=SC_3510O]] || <B>[[SC_3510O|The Great Assembly]]</b><br>Losing | |||
!style="width:200px"|[[File: | |||
| | |||
|- | |- | ||
!style="width:200px"| [[File:SC_3510P.png|200px|link=SC_3510P]] || <B>[[SC_3510P|The Great Assembly]]</b><br>Tolwyn: Effective soldiers require effective tools. | |||
!style="width:200px"|[[File: | |||
| | |||
|- | |- | ||
!style="width:200px"| [[File:SC_3510Q.png|200px|link=SC_3510Q]] || <B>[[SC_3510Q|The Great Assembly]]</b><br>Blair: The skies are full of criminals, aren't they? | |||
!style="width:200px"|[[File: | |||
| | |||
|- | |- | ||
! | !style="width:200px"| [[File:SC_3510R.png|200px|link=SC_3510R]] || <B>[[SC_3510R|The Great Assembly]]</b><br>Blair: The skies are full of criminals, aren't they? | ||
|- | |- | ||
! | !style="width:200px"| [[File:SC_3510S.png|200px|link=SC_3510S]] || <B>[[SC_3510S|The Great Assembly]]</b><br><i>Tell them more ...<i> | ||
| | |||
|- | |- | ||
! | !style="width:200px"| [[File:SC_3510T.png|200px|link=SC_3510T]] || <B>[[SC_3510T|The Great Assembly]]</b><br><i>Attack Tolwyn.<i> | ||
| | |||
|- | |- | ||
!style="width:200px"| [[File:SC_3510U.png|200px|link=SC_3510U]] || <B>[[SC_3510U|The Great Assembly]]</b><br>Winning Endgame | |||
| | |||
|- | |- | ||
!style="width:200px"| [[File:SC_3510V.png|200px|link=SC_3510V]] || <B>[[SC_3510V|The Great Assembly, Prison Cell]]</b><br>Winning Endgame | |||
|- | |- | ||
! | !style="width:200px"| [[File:SC_3510W.png|200px|link=SC_3510W]] || <B>[[SC_3510W|Space, Hangar Bay]]</b><br>Winning Endgame | ||
|- | |- | ||
!style="width:200px"| [[File:SC_3510X.png|200px|link=SC_3510X]] || <B>[[SC_3510X|Tolwyn's Office]]</b><br>Winning Endgame | |||
|- | |- | ||
! | !style="width:200px"| [[File:SC_3510Y.png|200px|link=SC_3510Y]] || <B>[[SC_3510Y|The Great Assembly]]</b><br>Losing Endgame | ||
| | |||
|- | |- | ||
! | !style="width:200px"| [[File:SC_3510Z.png|200px|link=SC_3510Z]] || <B>[[SC_3510Z|The Great Assembly]]</b><br>Losing Endgame | ||
| | |||
|- | |- | ||
!style="width:200px"| [[File:SC_3630A.png|200px|link=SC_3630A]] || <B>[[SC_3630A|Tolwyn's Office, Cantina]]</b><br>Losing Endgame 1 | |||
| | |||
|- | |- | ||
!style="width:200px"| [[File:SC_3670A.png|200px|link=SC_3670A]] || <B>[[SC_3670A|Space]]</b><br>Losing Endgame 2 | |||
| | |||
|- | |- | ||
!style="width:200px"| [[File:SC_3670B.png|200px|link=SC_3670B]] || <B>[[SC_3670B|Space]]</b><br>Losing Endgame 2 | |||
|- | |- | ||
! | !style="width:200px"| [[File:SC_3670C.png|200px|link=SC_3670C]] || <B>[[SC_3670C|Space]]</b><br>Losing Endgame 2 | ||
|- | |- | ||
!style="width:200px"| [[File:SC_3670D.png|200px|link=SC_3670D]] || <B>[[SC_3670D|Flight Deck]]</b><br>Losing Endgame 2 | |||
|- | |- | ||
! | !style="width:200px"| [[File:SC_3670E.png|200px|link=SC_3670E]] || <B>[[SC_3670E|Prison Cell]]</b><br>Losing Endgame 2 | ||
| | |||
|- | |- | ||
! | !style="width:200px"| [[File:SC_3670F.png|200px|link=SC_3670F]] || <B>[[SC_3670F|The Great Assembly]]</b><br>Losing Endgame 2 | ||
| | |||
|- | |- | ||
! | !style="width:200px"| [[File:SC_3670G.png|200px|link=SC_3670G]] || <B>[[SC_3670G|Prison Cell]]</b><br>Losing Endgame 2 | ||
|- | |- | ||
!style="width:200px"| [[File:SC_3670H.png|200px|link=SC_3670H]] || <B>[[SC_3670H|Space, Vesuvius Bridge]]</b><br>Losing Endgame 2 | |||
|- | |- | ||
! | !style="width:200px"| [[File:SC_5150A.png|200px|link=SC_5150A]] || <B>[[SC_5150A|Corridors]]</b><br>Officer's Lounge | ||
|- | |- | ||
!style="width:200px"| [[File:SC_5150B.png|200px|link=SC_5150B]] || <B>[[SC_5150B|Corridors]]</b><br>Officer's Lounge | |||
|- | |- | ||
! | !style="width:200px"| [[File:SC_5150C.png|200px|link=SC_5150C]] || <B>[[SC_5150C|Corridors]]</b><br>Officer's Lounge | ||
| | |||
|- | |- | ||
!style="width:200px"| [[File:SC_5150D.png|200px|link=SC_5150D]] || <B>[[SC_5150D|Corridors]]</b><br>Flight Control | |||
|- | |- | ||
! | !style="width:200px"| [[File:SC_5150E.png|200px|link=SC_5150E]] || <B>[[SC_5150E|Corridors]]</b><br>Flight Control | ||
| | |||
|- | |- | ||
!style="width:200px"| [[File:SC_5150F.png|200px|link=SC_5150F]] || <B>[[SC_5150F|Corridors]]</b><br>Flight Control | |||
|- | |- | ||
! | !style="width:200px"| [[File:SC_5150G.png|200px|link=SC_5150G]] || <B>[[SC_5150G|Corridors]]</b><br>Flight Control | ||
|- | |- | ||
! | !style="width:200px"| [[File:SC_5160A.png|200px|link=SC_5160A]] || <B>[[SC_5160A|Corridors]]</b><br>Eisen's Cabin | ||
|- | |- | ||
!style="width:200px"|[[File: | !style="width:200px"| [[File:SC_7330A.png|200px|link=SC_7330A]] || <B>[[SC_7330A|Space]]</b><br>Confederation ejection | ||
| | |||
|[[ | |||
|- | |- | ||
!style="width:200px"| [[File:SC_7340A.png|200px|link=SC_7340A]] || <B>[[SC_7340A|Space]]</b><br>Confederation ejection | |||
!style="width:200px"|[[File: | |||
|[[ | |||
|- | |- | ||
!style="width:200px"| [[File:SC_7370A.png|200px|link=SC_7370A]] || <B>[[SC_7370A|Space]]</b><br>Border Worlds ejection | |||
!style="width:200px"|[[File: | |||
| | |||
| | |||
|- | |- | ||
!style="width:200px"| [[File:SC_7380A.png|200px|link=SC_7380A]] || <B>[[SC_7380A|Space]]</b><br>Border Worlds ejection | |||
!style="width:200px"|[[File: | |||
| | |||
|- | |- | ||
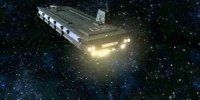
! | !style="width:200px"| [[File:SC_8000A.png|200px|link=SC_8000A]] || <B>[[SC_8000A|Space]]</b><br>Lexington jumps out | ||
|- | |- | ||
!style="width:200px"|[[File: | !style="width:200px"| [[File:SC_8000B.png|200px|link=SC_8000B]] || <B>[[SC_8000B|Space]]</b><br>Lexington jumps in | ||
| | |||
|- | |- | ||
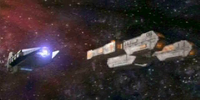
! | !style="width:200px"| [[File:SC_8001A.png|200px|link=SC_8001A]] || <B>[[SC_8001A|Space]]</b><br>Intrepid jumps out | ||
|- | |- | ||
!style="width:200px"|[[File: | !style="width:200px"| [[File:SC_8001B.png|200px|link=SC_8001B]] || <B>[[SC_8001B|Space]]</b><br>Intrepid jumps in | ||
| | |||
|[[ | |||
|- | |- | ||
! | !style="width:200px"| [[File:SC_8002A.png|200px|link=SC_8002A]] || <B>[[SC_8002A|Space]]</b><br>Hellcat enters atmosphere | ||
|- | |- | ||
!style="width:200px"|[[File: | !style="width:200px"| [[File:SC_8003A.png|200px|link=SC_8003A]] || <B>[[SC_8003A|Space]]</b><br>Hellcat exits atmosphere | ||
| | |||
|- | |- | ||
! | !style="width:200px"| [[File:SC_8004A.png|200px|link=SC_8004A]] || <B>[[SC_8004A|Space]]</b><br>Vindicator enters atmosphere | ||
|- | |- | ||
!style="width:200px"|[[File: | !style="width:200px"| [[File:SC_8005A.png|200px|link=SC_8005A]] || <B>[[SC_8005A|Space]]</b><br>Vindicator exits atmosphere | ||
| | |||
|- | |- | ||
! | !style="width:200px"| [[File:SC_8006A.png|200px|link=SC_8006A]] || <B>[[SC_8006A|Space]]</b><br>Escorting shuttles | ||
|- | |- | ||
! | !style="width:200px"| [[File:SC_8009A.png|200px|link=SC_8009A]] || <B>[[SC_8009A|Space]]</b><br>Lance enters atmosphere | ||
| | |||
|[[ | |||
| | |||
|- | |- | ||
! | !style="width:200px"| [[File:SC_8010A.png|200px|link=SC_8010A]] || <B>[[SC_8010A|Space]]</b><br>Lance jump transition | ||
|- | |- | ||
!style="width:200px"|[[File: | !style="width:200px"| [[File:SC_8011A.png|200px|link=SC_8011A]] || <B>[[SC_8011A|Space]]</b><br>Bluepoint station destroyed | ||
| | |||
| | |||
|- | |- | ||
! | !style="width:200px"| [[File:SC_8013A.png|200px|link=SC_8013A]] || <B>[[SC_8013A|Space]]</b><br>Final encounter with Seether | ||
|- | |- | ||
!style="width:200px"|[[File: | !style="width:200px"| [[File:ORIGIN.png|200px|link=ORIGIN (Wing Commander IV cutscene)]] || <B>[[ORIGIN (Wing Commander IV cutscene)|ORIGIN]]</b><br>Origin logo | ||
| | |||
|- | |- | ||
!style="width:200px"| [[File:Dolby.png|200px|link=DOLBY (Wing Commmander IV cutscene)]] || <B>[[DOLBY (Wing Commmander IV cutscene)|DOLBY]]</b><br>Dolby Surround Logo | |||
!style="width:200px"|[[File: | |||
| | |||
|- | |- | ||
! | !style="width:200px"| [[File:Lionlogo.png|200px|link=LIONLOGO]] || <B>[[LIONLOGO|Lion Logo]]</b><br>Lion Entertainment Logo | ||
|- | |- | ||
|} | |} | ||
{{Navbox Cutscenes/ | {{Navbox Cutscenes/Wing Commander IV}} | ||
{{Navbox Communications/ | {{Navbox Communications/Wing Commander IV}} | ||
Revision as of 17:16, 24 November 2023
This page links to a complete collection of cutscenes which appeared in Wing Commander IV: The Price of Freedom as well as a variety of behind the scenes and marketing material.
Cutscenes
Main Plot
Introduction
| Introduction | |
|---|---|
 |
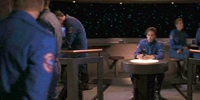
Space, Great Assembly, Cantina Bartender: you meet all kinds here; Veteran: buy a vet a drink? |
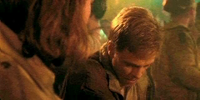 |
Cantina Help him out. |
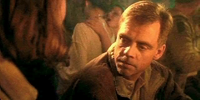 |
Cantina Straighten him out. |
 |
Cantina Maniac: earthworm or an eagle; Seether: shoves a man against a wall |
 |
Cantina, Space This pisses me off. Maniac: you've been recalled |
 |
Cantina, Space Ain 't my business. Maniac: you've been recalled |
 |
Space, Tolwyn's Office, Flight Deck Maniac: who was that?; Tolwyn: it's a sign of the times; Maniac: I could tell you, but I’d have to kill you |
 |
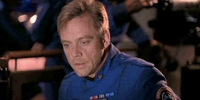
Flight Control Eisen: a few things have changed |
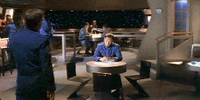 |
Officer's Lounge Vagabond: game of cards |
 |
Briefing Room Eisen: briefing |
 |
Flight Control Catscratch: meet Catscratch |
 |
Flight Control I like this kid. |
 |
Flight Control What's this kid want from me? |
 |
Briefing Room Eisen: mission briefing |
 |
Briefing Room Eisen: mission briefing |
 |
Officer's Lounge Vagabond/Maniac: are Border Worlds behind this? |
 |
Briefing Room Eisen: mission briefing |
 |
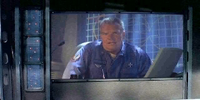
Eisen's Cabin Eisen: Eisen hides what he's doing on the computer. |
 |
Briefing Room Eisen: mission briefing |
 |
Briefing Room Eisen: mission briefing |
 |
Flight Deck Eisen/Paulsen: orders from Regional Command |
 |
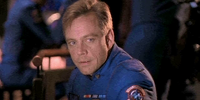
Briefing Room Tolwyn: asks how the situation is via communique |
 |
Officer's Lounge Maniac: female scientist; Catscratch: asks about Paulsen |
 |
Officer's Lounge New brass — pain in the ass. |
 |
Officer's Lounge Kid asks too many questions. |
 |
Briefing Room Paulsen: where's Eisen, mission briefing |
 |
Officer's Lounge, Tolwyn's Office Maniac: puts the moves on the scientist; Newscast: Union of Border Worlds declares independence |
 |
Officer's Lounge Maniac/Vagabond: debate over newscast |
 |
Officer's Lounge Confed’s abusing their authority. |
 |
Officer's Lounge Vagabond Confed needs to damp down. |
 |
Eisen's Cabin Eisen: old man's looking forward to new challenges |
 |
Briefing Room Paulsen: mission briefing |
 |
Briefing Room Tolwyn: communique, response to previous comm |
 |
Officer's Lounge Catscratch: he's from the Border Worlds |
 |
Officer's Lounge The kids got a point ... |
 |
Officer's Lounge Who’s he to question Confed? |
 |
Eisen's Cabin Eisen: our ultimate duty |
 |
Flight Control Maniac: invites you to a drink as you are ordered off deck |
 |
Flight Control I need to see what’s going on. |
 |
Flight Control, Flight Deck I don ’t feel like spending time in the brig. |
 |
Officer's Lounge Maniac: Maniac buys you a drink |
 |
Briefing Room Paulsen: mission briefing. Captain Eisen has stolen a shuttle |
 |
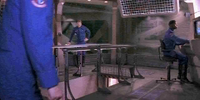
Space, Launch Deck Panther/Hawk/Eisen: I recognize those names |
 |
Launch Deck Pliers: meet Pliers |
 |
Launch Deck Bet this old coot knows what he ’s doing. |
 |
Launch Deck Here s a guy they should have put out to pasture. |
 |
Galley Sosa: Confed's got a lot of skeletons in its lockers |
 |
Galley Maniac: a long, hard road ahead |
 |
Chart Room Eisen/Panther/Hawk: I think this ship needs a captain |
 |
Combat Information Center Eisen: mission briefing |
 |
Hangar Bay Pliers: I stripped your ship for parts |
 |
Hangar Bay Well, he is resourceful. |
 |
Hangar Bay I knew this guy was trouble. |
 |
Storage Hold Vagabond/Catscratch: I don't know what the rules are anymore |
 |
Combat Information Center Eisen: mission briefing |
 |
Space Lexington destroyed. |
 |
Space Lexington disabled. |
 |
Shuttle Seether/Paulsen: you're getting reassigned |
| File:SC 1200D.png | Shuttle Seether/Paulsen: you're getting reassigned |
 |
Combat Information Center Eisen/Sosa: we're going on a scavenger hunt |
 |
Galley Panther: something better to do than killing |
 |
Galley Yeah ... You’d think ... |
 |
Galley She's dreaming ... |
 |
Combat Information Center Eisen: mission briefing |
 |
Hangar Bay Pliers: Pliers shows his "toys" |
 |
Hangar Bay Pliers: Pliers shows his "toys" |
 |
Hangar Bay This thing could be very useful ... |
 |
Hangar Bay I can ’t trust this guy. |
 |
Galley Maniac/Vagabond: Vagabond loses card game |
 |
Combat Information Center Hawk: didn't you enjoy blasting cats |
 |
Combat Information Center Gotta admit. I did. |
 |
Combat Information Center This guy’s bloodthirsty. |
 |
Combat Information Center Eisen: mission briefing |
 |
Comm Station Sosa/Vagabond: see Vagabond get hit |
 |
Launch Deck Blair: Vagabond's funeral (immediately after mission) |
 |
Flight Deck Paulsen/Seether: the traitor will pay |
 |
Officer's Lounge Catscratch: I don't understand it, sir |
 |
Briefing Room Paulsen/Seether: mission briefing |
 |
Officer's Lounge Paulsen: I heard no mention of honor. Captain |
 |
Officer's Lounge Catscratch: Seether has taken over Eisen's cabin |
 |
Officer's Lounge What a self-important bastard. |
 |
Officer's Lounge Everything's going to hell. |
 |
Eisen's Cabin Seether: we've seen each other |
 |
Briefing Room Paulsen/Seether: mission briefing |
 |
Flight Deck Seethe: who do you think actually runs this ship? |
 |
Briefing Room Paulsen: mission briefing |
 |
Launch Deck Panther/Hawk: I recognize those names |
 |
Tolwyn's Office Tolwyn/Paladin: the great hero has defected |
 |
Chart Room Sosa/Eisen: is comm data what you wanted? |
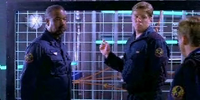 |
Chart Room Eisen/Maniac: I tried to blow you both away |
 |
Galley Maniac: aces kept coming my way |
 |
Combat Information Center Eisen: mission briefing |
 |
Combat Information Center Eisen/Melek: we've been harassed by unknown forces |
 |
Galley Panther/Catscratch: is Eisen making the right call? |
 |
Galley Straighten this kid out. |
 |
Galley Do I look like I have all the answers? |
 |
Galley Melek: what is this word "payback"? |
 |
Storage Hold Hawk: I fought those animals in the war |
 |
Storage Hold He’s missing the point ... |
 |
Storage Hold Bitter guy. |
 |
Combat Information Center Eisen: he'll be acting commander |
 |
Hangar Bay |
 |
Combat Information Center Blair: mission briefing |
 |
Galley Catscratch/Sosa: I helped straighten him out |
 |
Galley Catscratch/Sosa: I helped straighten him out |
 |
Galley Catscratch/Sosa: I helped straighten him out |
 |
Storage Hold Dekker: we re ready to go to work |
 |
Combat Information Center Blair: mission briefing |
 |
Space, Combat Information Center Sosa/Maniac: all the screens go dead |
 |
Combat Information Center Wilford: taped message from Admiral |
 |
Control Bay Pliers: ship advice |
 |
Control Bay Pliers: ship advice |
 |
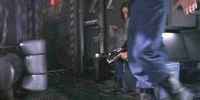
Hangar Bay Panther/Hawk/Vet: interrogate the prisoner |
 |
Hangar Bay Panther/Hawk/Vet: interrogate the prisoner |
 |
Combat Information Center Blair: mission briefing |
 |
Combat Information Center Blair: mission briefing |
 |
Combat Information Center Blair: mission briefing |
 |
Space Combat Information Center Dekker: sees spacelab, takes off in his shuttle |
 |
Control Bay Maniac: you'll never believe it |
 |
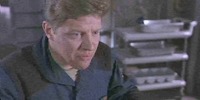
Storage Hold Tolwyn: am I your prisoner of war |
 |
Storage Hold I owe him ... |
 |
Storage Hold I owe him nothing. |
 |
Launch Deck Tolwyn leaves the Intrepid |
 |
Control Bay Talking to Dekker about Tolwyn |
 |
Control Bay Maniac freed Tolwyn |
 |
Combat Information Center Blair: live feed from Wilford, mission briefing; Hawk/Panther: save innocents or get weapons |
 |
Combat Information Center Panther's right. |
 |
Combat Information Center Hawk's right. |
 |
Circe V, Space Circe V: a fierce ground war is being fought in the trenches |
 |
Galley Maniac/Dekker: I'll kick your ass |
 |
Galley Maniac's gonna get creamed. |
 |
Galley This I gotta see ... |
 |
Combat Information Center Blair: live feed from Wilford, mission briefing |
 |
Combat Information Center Blair: choose second mission, mission briefing |
 |
Combat Information Center Loading screen |
 |
Combat Information Center Mission selection |
 |
Combat Information Center Mission A briefing |
 |
Combat Information Center Mission C briefing |
 |
Combat Information Center Mission D briefing |
 |
Storage Hold Panther: your friend with the overactive glands |
 |
Storage Hold Tempting, but I can t let that happen. |
 |
Storage Hold Maniac's on his own. |
 |
Galley Catscratch/Maniac: name on gold watch or coffin |
 |
Combat Information Center Sosa: Circean comm data |
 |
Combat Information Center Blair: mission briefing |
 |
Hangar Bay Maniac/Catscratch: you saved my life |
 |
Hangar Bay Warning Maniac about Panther |
 |
Hangar Bay Warning Maniac about Hawk |
 |
Hangar Bay Catscratch is grounded. |
 |
Hangar Bay Blair: Catscratch's funeral |
 |
Control Bay Pliers: you wanna try my new cloaker? |
 |
Control Bay Who needs wingmen? |
 |
Control Bay I prefer a wingman. |
 |
Galley Sosa: it will make you feel better |
 |
Galley Sosa: it will make you feel better |
 |
Combat Information Center Panther/Hawk: how long since Eisen left |
 |
Combat Information Center There's always hope ... |
 |
Combat Information Center We die trying ... |
 |
Combat Information Center Blair: mission briefing |
 |
Combat Information Center Shut down the supply line. |
 |
Combat Information Center Send Dekker in. |
 |
Combat Information Center Blair: mission briefing |
 |
Combat Information Center Blair: mission briefing |
 |
Space Shipyard shot of busy Confederation Shipyard |
 |
Combat Information Center Blair: mission briefing |
 |
Combat Information Center Blair: mission briefing |
 |
Combat Information Center Blair: mission briefing |
 |
Combat Information Center Blair: mission briefing |
 |
Combat Information Center Blair: mission briefing |
 |
Combat Information Center Blair: mission briefing |
 |
Combat Information Center Blair: mission briefing |
 |
Storage Hold Hawk: your friend's really pissing me off |
 |
Storage Hold Time to be a captain. |
 |
Storage Hold What a whiner. |
 |
Combat Information Center Blair: mission briefing |
 |
Control Bay Pliers: want extra punch? |
 |
Control Bay Pliers: want extra punch? |
 |
Control Bay I could use the extra firepower. |
 |
Control Bay I got a need for speed. |
 |
Combat Information Center Blair: mission briefing |
 |
Combat Information Center Collect weapons. |
 |
Combat Information Center Collect fighters. |
 |
Combat Information Center Blair: mission briefing |
 |
Hangar Bay Pliers: what the heck is this |
 |
Hangar Bay Pliers: I ain’t gonna cannibalize these babies |
 |
Hangar Bay Let me at these babies. |
 |
Hangar Bay They could be death-traps. |
 |
Combat Information Center Sosa: something terrible has happened on FT957 |
 |
Combat Information Center Blair: mission briefing |
 |
Space Planet FT957: the genetic ax |
 |
Space Planet FT957: the genetic ax |
 |
Telamon Planet FT957: the genetic ax |
 |
Space Planet FT957: the genetic ax |
 |
Space Planet FT957: the genetic ax |
 |
Storage Hold Sosa: light a candle |
 |
Combat Information Center Maniac: message from Admiral Wilford |
 |
Combat Information Center Blair: mission briefing |
 |
Axius Tolwyn/Seether: meet the Black Lance; Brody: I know a way |
 |
Space, Vesuvius Bridge Seether/Tolwyn: there has been a security breach |
 |
Control Bay Dekker/Pliers: what did you find? |
 |
Combat Information Center Panther/Hawk: should we use the Flash-pak ? |
 |
Combat Information Center Panther's right. We can't kill civilians. |
 |
Combat Information Center Hawk's right. This is war. |
 |
Combat Information Center Blair: mission briefing |
 |
Combat Information Center Blair: mission briefing |
 |
Space Ella destroyed. |
 |
Space Ella avoided. |
 |
Space, Combat Information Center, Vesuvius Bridge Tolwyn: the Intrepid is closing in; Sosa: he's turning around |
 |
Space, Combat Information Center Eisen: mission briefing (via hologram) |
 |
Space Jump to Sol |
 |
Hangar Bay Pliers: I can rig the Flash-pak |
 |
Hangar Bay Its now or never. |
 |
Hangar Bay Too risky. |
 |
Combat Information Center, Vesuvius Bridge Tolwyn: I'm the one who's invincible (via hologram) |
 |
Combat Information Center Eisen: mission briefing (via hologram) |
 |
Combat Information Center Eisen: mission briefing (via hologram) |
 |
Combat Information Center Eisen: mission briefing (via hologram) |
 |
Combat Information Center Eisen: mission briefing |
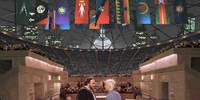 |
The Great Assembly, Space Tolwyn: If there is a cancer amongst us, let us cut it out. |
 |
The Great Assembly Seize the moment. |
 |
The Great Assembly Careful. Fools rush in ... |
 |
The Great Assembly Tolwyn: Do you really believe that this chamber is that ignorant? |
 |
The Great Assembly You're not sucking me in. |
 |
The Great Assembly Two can play that game. |
 |
The Great Assembly Tolwyn: Please continue. Colonel. |
 |
The Great Assembly Dance around him ... |
 |
The Great Assembly Confront him. |
 |
The Great Assembly Tolwyn: Harmony is maintained through control. |
 |
The Great Assembly He'll trip himself up. |
 |
The Great Assembly He's power mad. |
 |
The Great Assembly Paladin (to Tolwyn): What are these "Black Lance" forces he's referring to? |
 |
The Great Assembly Winning |
 |
The Great Assembly Losing |
 |
The Great Assembly Tolwyn: Effective soldiers require effective tools. |
 |
The Great Assembly Blair: The skies are full of criminals, aren't they? |
 |
The Great Assembly Blair: The skies are full of criminals, aren't they? |
 |
The Great Assembly Tell them more ... |
 |
The Great Assembly Attack Tolwyn. |
 |
The Great Assembly Winning Endgame |
 |
The Great Assembly, Prison Cell Winning Endgame |
 |
Space, Hangar Bay Winning Endgame |
 |
Tolwyn's Office Winning Endgame |
 |
The Great Assembly Losing Endgame |
 |
The Great Assembly Losing Endgame |
 |
Tolwyn's Office, Cantina Losing Endgame 1 |
 |
Space Losing Endgame 2 |
 |
Space Losing Endgame 2 |
 |
Space Losing Endgame 2 |
 |
Flight Deck Losing Endgame 2 |
 |
Prison Cell Losing Endgame 2 |
 |
The Great Assembly Losing Endgame 2 |
 |
Prison Cell Losing Endgame 2 |
 |
Space, Vesuvius Bridge Losing Endgame 2 |
 |
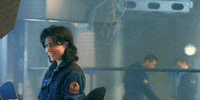
Corridors Officer's Lounge |
 |
Corridors Officer's Lounge |
 |
Corridors Officer's Lounge |
 |
Corridors Flight Control |
 |
Corridors Flight Control |
 |
Corridors Flight Control |
 |
Corridors Flight Control |
 |
Corridors Eisen's Cabin |
 |
Space Confederation ejection |
 |
Space Confederation ejection |
 |
Space Border Worlds ejection |
 |
Space Border Worlds ejection |
 |
Space Lexington jumps out |
 |
Space Lexington jumps in |
 |
Space Intrepid jumps out |
 |
Space Intrepid jumps in |
 |
Space Hellcat enters atmosphere |
 |
Space Hellcat exits atmosphere |
 |
Space Vindicator enters atmosphere |
 |
Space Vindicator exits atmosphere |
 |
Space Escorting shuttles |
 |
Space Lance enters atmosphere |
 |
Space Lance jump transition |
 |
Space Bluepoint station destroyed |
 |
Space Final encounter with Seether |
 |
ORIGIN Origin logo |
 |
DOLBY Dolby Surround Logo |
 |
Lion Logo Lion Entertainment Logo |