Episode 4 - Winning Mission 5 - Clearing the Path
| Clearing the Path | |
|---|---|
| Date | 2668.363.2125 |
| Fighter | Sabre |
| Wingmen | Cougar and Troll |
| Other Friendly Ships | 3 wings of Rapiers, 1 wing of Sabres, 1 wing of Morningstars (arrive mid-mission), 1 wing of Epees (arrive mid-mission) |
| Objectives |
|
| Previous | Episode 3 - Winning Mission 3A - Rearguard Action OR Episode 3 - Winning Mission 3B - Holding the Line OR Episode 3 - Winning Mission 4 - Destroyer Rescue OR Episode 3 - Losing Mission 4A - Marching to Sirius OR Episode 3 - Losing Mission 3B - Making Way |
| Next | Sufficient Escorts Destroyed Episode 4 - Winning Mission 6A - Torpedo Delivery Sufficient Escorts Survive Episode 4 - Winning Mission 6B - Torpedo Deliveries |
Preflight Conversations
Briefing
It's time to really get to work, Captain. Today, our fleet will be launching an all-across-the-board attack at the Kilrathi. This will be the biggest battle we've ever faced... at least until the next one. Anyway, here's the plan for today. Most of our fleet's ships will be going directly after the carriers. Our job, however, will be different - your wing will concentrate on the escorts, to give the strike force a better chance of reaching their targets. It's difficult to say how many enemy vessels you're going to encounter out there. You probably will not be able to destroy them all. Take out as many as you can - the more damage we can deal to their perimeter defences, the more likely we are to get a shot at their carriers. Good hunting.
Mission Layout
- 2 Targu II
- Target Area Nav
- 8 Krant
- 1 Krant Ace Virahn Bloodclaw
- 6 Targu II
- 3 Ralatha
- Kilrathi Reinforcements
Player Notes
This mission has you thinning out the Kilrathi fleet’s picket line. Your priority during the mission should be the capships. Use your torpedoes carefully and make sure to allow your wingmen the time to do their damage.
Until all Kilrathi capships have been destroyed, ejection at Target Area NAV means capture. Everywhere else, ejection is safe at any time.
You fly a Sabre on this mission. It is armed in its anti-capship role. Your strike force is fairly large consisting of nine Rapiers and six Sabres.
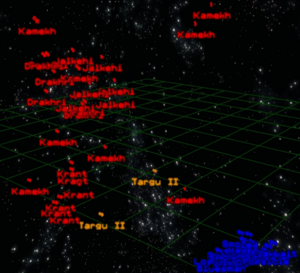
There is an intercept nav between the Target Area Nav and the Firekka. At this intercept nav are eight Kamekhs, two Targu IIs, and six each of Drakhri, Jalekhi and Krants (see image). No matter what you do, you will always encounter this intercept nav when you autopilot.
The positioning of friendly and enemy fighters here allows you a torpedo run at the Targu-II frigates before the enemy interceptors get their act together. Charge at one of the nearby TIIs, pulse the afterburners irregularly to throw off any turret or interceptor fire, get in the blind spot directly in front and loose a torpedo to take out the first frigate at this nav point, then head on over and kill the other one before the enemy can react (intermittent afterburners are recommended for shaking turret fire). After that it depends on how the battle is progressing. I recommend killing any relatively nearby corvettes before going into dogfighter mode and trying to take out as many fighters as possible. In the end you've got four torpedoes and this mission needs fourteen, so you've got to maximise wingman efficiency. The AI Wingmen are much better at killing fighters than corvettes, and equally better against destroyers than frigates (the Targu II's excellent turret coverage makes it very good at shooting down torpedoes not launched with this fact in mind), so probably put your four torpedoes into frigates and spend some time killing corvettes. However, since there's only two non-corvette capital ships at this nav point, your wingmen are much more likely to launch torpedoes at the one you're going for, so it's best to avoid that if possible - a quick glance at the radar (torps are annoyingly hard-to-see turquoise blips) is a good idea, or order them to attack fighters or corvettes.
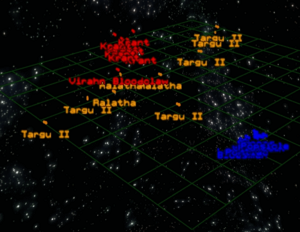
The target area nav contains 6 Targu II frigates and 3 Ralatha destroyers. The capships are escorted by 9 Krants, including ace Virahn Bloodclaw in a Krant (image).
Once again, you're clear to make a torpedo run at the point frigate, and that's probably a good idea. In general the plan is to take down as many frigates as you have remaining torpedoes, to decrease the amount of flak around and also to prevent any torpedoes being wasted on them. Look at the tactical map, find a frigate relatively uncovered by enemy fighters, torpedo it, repeat until you're out of torpedoes. Around then your reinforcements, four Epees and four Morningstars from the Concordia, ought to arrive, in an area that ought to be relatively quiet so they will probably start making torpedo runs. You should either kill any fighters which might be after the bombers or start going after Targu II turrets if they're all or nearly all down.
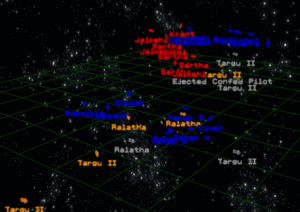
After six of the first nine ships are destroyed, six Sartha and three Jalkehi appear (image).
Since the majority of the AI fighters are likely to be involved in anti-capship strikes at this point, they will be very vulnerable and so you need to respond to this threat immediately, so this is where I would recommend using the majority of your missiles. The Sarthas are difficult for a Sabre to keep up with, though if you can taunt them into going head to head with you then they're very easy kills. The Jalkehi are probably simplest to pick off with missiles though they're also slow and lumbering enough you can probably outfly them.
Five minutes after the first set of Kilrathi reinforcements, three Sartha and six Drakhri appear, though you really should be done with the battle by then. Once all torpedoes are fired or less than three Sabres are left you will receive a recall order. Provided you use your torpedoes wisely (which generally means killing frigates) you should be able to destroy enough ships to get a mission accomplished, though a bit of luck may be required for a clean sweep. The more ships you destroy in this mission results in fewer ships in the next mission.


