Privateer 2: Can't complete mission "Davis & Co. Armaments and Supplies, Nerve Weapon - Part C"

Thanks! I just beat it legitimately. At a lull in the waves I went back to Hermes, restocked and saved, then there was just one Destroyer to kill when I returned. If you leave the area the shields on the base and everything recharge, and if you land the armour recharges too. It took a lot of tries but I finally found the optimum position. From the start I Prox Missiled the two Blades to get them out of the way quickly, leaving five slots for Hellraisers which is just the right amount.

Select the second Lasertower and go straight for it, then go a little towards the Blades - only a little bit though. Then just wait for the Transports to come. One will be very close and the other not too far. Now here's the important part: Hit the close one with lasers to get it to redirect its turrets at you, and hit the far one with a BSE Mk II followed by lasers once you're close enough! Hopefully that will give you long enough to torpedo them both before the base gets destroyed. And don't forget to use Warp Shields when you're getting pummelled.

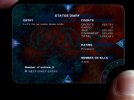
Once the first two Transports are dead, keep a look out for an enemy Destroyer fairly soon (one Destroyer is friendly though; the friendly one is between the two friendly Prototypes in target selection). Then there's a gap before a few Blades and a Destroyer, another gap and a final Destroyer. As I said before, it's safe to go back and save in a gap if you have landouts left. (But don't overwrite your file in case the mission glitched out.)

I don't think I really needed a wingman, and the Monolith may have helped a bit (it did destroy a Transport for me once, and I think it helped on my winning test run but it wasn't much help this time; in fact, it got itself blown up because it got into a shooting match with a friendly Destroyer, stupid thing). But on this file I had a choice between Vicksen Aureola (260, Skecis Mk II) or Monk Skungous (340, Straith). I decided a Straith was probably not a good pick so I went with Vicksen, but I don't think she was much help. I did try a few runs on my own with Nuke 'Ems, but they don't really do enough damage to the Military Transports here.
 
Last edited:
I have to wonder how the playtesters ran these missions, or whether they even did because relations between the developers at EA Manchester and QA at Origin were notoriously bad.
 
I found another glitch involving the news bulletins. Every time you read a news bulletin (not including the ones for extra equipment or the Freij Mk II I think), it decrements the value under GNEW. It doesn't check if the bulletin has already been read, so the value can decrement multiple times on the same landing or even in the same visit to the booth. If you land and this value is 0, it clears all the flags from 11 onwards (1-8 are for the equipment and Freij Mk II, and 9 and 10 are unused I think) under NEWS so that the bulletins are all listed as unread again. The glitch occurs if you read the bulletin again when the value is already 0 - let's say the value is 1 and you read the bulletin twice, or even if you read the bulletin once, go do something else then read it again before taking off - the value will underflow to 4294967295 and the flags won't be reset upon next landing.

The check for if the value is equal to 0 is only done when you land and only when the game's picking a new bulletin; not at any time while you're already landed, not when you save or load your game and importantly not if you land with the value already at 0 but the current bulletin isn't due to expire yet. This can happen even if you only view the bulletin once per landing. So if the value does underflow, the flags will never be reset and eventually so many bulletins will be marked as read that the game won't be able to find an unread bulletin in the category it picks (advert or price change), and the game will crash - it will hang with a black screen upon landing.

So to prevent this, try not to read the bulletin more than once per landing. If it does happen, you can go into Lin's editor and check the value under GNEW, which would be ridiculously huge (it should be under 76 normally; it normally starts at 74 but I've seen it start at 75). To manually fix it, set GNEW to 74 and unclear all the flags under NEWS, not including any set in the first 10. Technically the game unclears flags 11 to 85, but the editor only lists flags up to 65. So if you want to clear flags 66 to 85, you have to use a hex editor. Each flag is four bytes, 00 00 00 00 for off and 01 00 00 00 for on. Flag 1 is 5 bytes after the S in NEWS, and each subsequent flag is 4 bytes after the previous one. So Flag 11 starts 48 bytes after the N in NEWS (so exactly 3 lines down from the N if your editor has 16 bytes per line), and Flag 85 is 21 16-byte lines down and 5 bytes right of the S in NEWS, or 341 bytes after the S. Clear all flags between flags 11 and 85 if you want to work around this glitch correctly.

EDIT: An easier way to fix it: if GNEW has underflowed, set it to 0 in Lin's editor, then go to CCN Booth / News and look at the number by News Duration. If it's 1, that's all you need to do; as long as you don't read a non-equipment, non-Freij news item again before taking off, it will fix itself upon landing. If the number is 2 or 3, you have to land 2 or 3 times before it fixes itself and you mustn't read the news until it does, or it will underflow again. As long as GNEW is 0 at the time of landing AND the game is ready to show a new bulletin (possibly not including a bulletin for extra equipment or the Freij Mk II), all flags between 11 and 85 will be cleared and GNEW will be set to 74 or 75.

I'm assuming the glitch happens because GNEW is decremented even if the bulletin has already been read, and it shouldn't be. If this worked correctly, the number would never underflow because it wouldn't be possible - GNEW would only be able to decrement once per read bulletin so it wouldn't decrement too quickly for the flags to correctly reset. The flag that's set when you read a bulletin is the flag of the bulletin number plus one, so for example the Freij bulletin is bulletin 7 so flag P8 is set when this is read.

EDIT: A related glitch involves the first eight; the bulletins about new equipment and Freij. A new piece is released every hour for the first eight hours of gameplay; the checks are only done while landed and the equipment will appear the landing after that. The next bulletin is guaranteed to be for this equipment and it will be there for 3 landings. However, the queued-up bulletin will not be saved with the file, so if you save after the next piece of equipment has been unlocked but before you receive the bulletin, upon loading the file the bulletin won't be queued up any more. So it's possible to get all the new equipment and the Freij Mk II without ever seeing any of their bulletins, even if you read the bulletin every time you land.

EDIT: An already-read bulletin doesn't seem to decrement GNEW on the DARKFIX Windows version; only on the DOSBox version. Unless I'm mistaken, it looks like the DARKFIX version doesn't suffer from the underflow glitch.
 
Last edited:
Any escort mission will automatically complete if you jump away while you're both at the destination point (and the ship is moving). It's possible to glitch out the escort missions involving just getting a ship to land at a planet, no jumping required - if you tell the ship to get moving then land, upon taking off again the ship will wrongly think it's not reached its destination Nav Point yet and it will start jumping towards Karatikus (Nav Point #0). This applies to the following mission, at least: https://www.wcnews.com/wcpedia/SPORT.SAKKUHR.ROMPERS-ADMIN@CRIUS.NET . I'm not sure if it also applies to https://www.wcnews.com/wcpedia/ANONYMOUS@CRIUS without checking, because in this case there are two ships to escort and I'm not sure if you need to tell them to start moving or not. Either way, though, landing and taking off might make them think they need to jump towards #0.
I've looked into this some more. The glitch does occur with the Anonymous mission as well, and it's not Karatikus that it always jumps to; the game mixes up the planets' index numbers and Nav Points, so if it's landing at Karatikus, Nav #1 and index 4, landing will make it start jumping towards Crius, Nav #4.
 
So far I've found two missions where it's almost unavoidable to anger the CIS, meaning you have to land to stop them being hostile. One is the cinematic https://www.wcnews.com/wcpedia/Bernice_Barlow_(mission) (kill the Businessman; three Military Lights are there and they're almost guaranteed to turn on you once you attack the Businessman), and the other is https://www.wcnews.com/wcpedia/Stain-Away_Co. (once you attack the Ogan with the Pant Parts inside, you'll find the CIS angry if you encounter them after this and before landing). There is a workaround if you care enough: the clue is in the manual about how the CIS have lost "I didn't put that mine there" lawsuits. You can kill them with mines, and you won't get credit for the kill and you won't anger the CIS. Once I used a Proximity Missile on the Businessman and got away without angering the CIS, but I haven't been able to get that to work since. Surprisingly, the mission https://www.wcnews.com/wcpedia/Chirichan_Guard_Captain_-_Clear_Out_CIS doesn't anger them; only the CIS ships that are spawned by the mission are hostile.

Here's my current stats and loadout. I rearranged my missile loadout for the simple reason that I'm more likely to use a Hellraiser without a Banshee (very few capital ships require more than a single Hellraiser). If I need to torpedo multiple capital ships, it makes sense for the Hellraisers to be next to each other like that. If I do need to use the Banshee, I can select both that and the Hellraiser to fire simultaneously.

Recently I've started using the BSE Mk II more. I didn't used to use it much but it's actually pretty nice against capital ships to stop their turrets firing, and even shuttles in a pinch if I can't be arsed dodging its turret fire. You only have to wait about a minute for it to reload. The guide is wrong about it being limited to four uses, and there is no "safety mechanism" on the Mk I - they are identical apart from the likelihood of it working, as far as I can tell, and you can't fire either of them if you don't have a target selected. The BSE seems to have infinite range as well.

The Warp Shield recharges after about five minutes, so I tend to use it if my shields are about to go through, to save on repair costs. I didn't used to use this as often as I should at first, but I soon learnt to use it strategically. The BSE took me longer to start using properly, but now I've got my head round it, it's nice.

The Signal Filter isn't very useful. Enemies very rarely use a BSE, but occasionally they fire Disrupter Missiles. The first couple of times I got hit with a virus, I didn't realise that's what it was, and I thought my UCR (keyboard to joystick using vJoy) had stopped working; there's no visual indication other than your speed going to 0. But I don't like using mines or decoys for the most part (dodging missiles isn't that hard, and decoys are too expensive for what they are), and Nuke 'Ems are very expensive too. So I just stick with the Signal Filter because it does help, a little.

I decided to keep two Mass Ion Cannons, because with just one and four Kravens they still overheat a little too quickly for my liking. This way it takes a long time to overheat, and you really aren't losing anything because you can fire continuously for much longer without the guns cutting out.

EDIT: I'm not sure what's going on or how the game picks missions for the BBS (but I do know that if your three non-main non-video mission slots are full when you land, no missions will be offered so more wingmen and/or cargo ships will be there - even two identical freighters occasionally) - maybe missions are weighted by probability or maybe the difficulty level determines which can be offered? All I know from experience is that the same missions keep getting offered. Some are very common and some are moderately so, and some never seem to appear. Today I was offered https://www.wcnews.com/wcpedia/CIS_HQ_Captured_Destroyer twice in a row, having never seen it before on this file after many hours of play, and earlier I saw https://www.wcnews.com/wcpedia/CIS_Infected_Humanist_Rebel_-_Part_A - this one was really common on a previous playthrough but it was the first time I saw it this file. Unfortunately I was testing things so I couldn't attempt it for my main file.

I am beginning to wonder if some are dummied out. I will try to work out which I've seen and how common, roughly, it's been for me. It's odd. I would love to know how it works. For example, earlier in the thread when I tested the Carver mission, that was via adding it manually to the BBS. Never seen it naturally.

More info to follow. Please let me know if I should edit posts more or whether it's better to add a new post to the thread for an update. If it's a minor thing I'll just edit. I already edited a few things before, so reread the thread and check which posts were recently edited - I got some stuff wrong so I made some corrections. I said I went back to four Kravens and one Ion but then realised that wasn't great - so I clarified things. I also made a mistake describing the Ex-Mining Base stolen capital ships. There are actually two Transports and three enemy Destroyers. The Transports spawn together and the Destroyers take longer and spawn separately (except the first, which comes not long after the Transports). The guide is very wrong - it gets Transports and Destroyers mixed up and says you have to kill the Messineo Destroyers, which is wrong too as they're on our side. The Duress is not an enemy; it just flits about. Probably a glitch.

One final thing for now: I was able to change the stuff that spawned. I forget exactly how but some bytes are coordinates so I was able to make things spawn further away or whatever. And the two bytes before the ID of an object is the type of object; if it's FF FF it's removed and/or killed, and it's normally ?? 00 where ?? is the type of object. In Lin's editor under Shipattributes, find the number of a ship or object in the list and add 19; this is what goes in the ?? to spawn that object. I changed the Spacedude? (Cravien Shard) into an Unknown Ship (Talon), a Super Duress which shows on the target as a radar station, and even an enemy Freij Mk II which is a sight to behold! Five Kravens and lots of advanced missiles; tons of health just like the playable ship! It took a lot to kill it. There don't seem to be any enemy Freij 2s in any of the missions so it was nice to see this. The Talon swoops in and out as if to attack but never fires at you - its max speed is 400 and it flies pretty well for a ship that's only used in one mission as a derelict. Finally I changed my own ship to a Dreadnought and gave it lasers; it is so painfully slow and turns so slowly... you can see the jutting out parts from the cockpit, and the lasers all fire right in the middle overlapping each other. It looked like the turrets were turning towards enemy ships but they never fired.

If anyone wants me to set up anything for them to try out or test, please just let me know!
 

Attachments

  • 2023-10-16 (2).png
    2023-10-16 (2).png
    136.7 KB · Views: 13
  • 2023-10-16 (1).png
    2023-10-16 (1).png
    143.6 KB · Views: 15
Last edited:
The mission https://www.wcnews.com/wcpedia/Conrad_Bikunski_-_Part_B has another minor glitch that I just noticed. One of the Papogod Ecantona escorts that arrives if you wait at Nav #200 after finishing Part A has Pinet el-Susse's likeness as his pilot picture. He has no response if you taunt him, and his death quote is Pinet's. https://www.wcnews.com/wcpedia/Pinet_el-Susse

EDIT: The rest of the Papogod escorts seem to be very random. They often aren't anywhere near the Transport, and I've found them in different places. One time I found them over near Hephaestus, one time at Nav #17 near Crius, one time they kept jumping between ES:Corsas at Nav #94 and Corinthias at Nav #91 back and forth, never staying long enough to be killed. Sometimes they don't even bother attacking; they either just sit there or fly straight forwards and let themselves be shot to pieces. So it seems this is one of the more glitchy missions. As long as you've visited Nav #94 and killed them all including the Military Transport of course (which can be killed before you ever see it sometimes) in any order, you win, but unfortunately the randomness means you may not encounter the rest of the Papogods to kill. Looking in the save data when I lost them one time didn't really help - it showed where they were at that time but they carried on jumping around. Next time I landed to have another look, the mission failed.

EDIT: If you jump after Part A but before killing the Military Transport, you anger the CIS. Stay at #200 after Part A and wait for the Transport to arrive. The first two escorts should arrive just before or after the Transport, and the other five will eventually turn up if you just wait there.

The SOS mission https://www.wcnews.com/wcpedia/Pilot_Brad_(Nation_Cargo_Courier_2) has the Mercenary using the likeness of Brad Califaryan. So that one makes sense, partially, although Brad as a wingman flies a Velacia, not a Duress. https://www.wcnews.com/wcpedia/Brad_Califaryan
 
Last edited:
https://www.wcnews.com/wcpedia/Rutger_O'Malley is another glitchy mission, similar to Conrad Bikunski Part B. In the same way, the Kiowan Shuttles start jumping straight away, so you'll only find them at Nav Point #5 if you're actually starting there, taking off from Hermes. The escorts can end up getting lost and in weird places, nowhere near their intended route, just like the other mission - I found them near Crius at one point. And they can end up just sitting there, not attacking, if you do encounter them after the Shuttles are dead, or they can carry on jumping around sometimes. The missions are glitched in very similar ways. The difference here, though, is that since you don't actually have to go to a particular Nav Point for the mission to be classed as won, and you don't have to destroy all the escorts as you do in the other mission, this mission can complete by itself without you doing anything at all! I accepted the mission at Serca, Nav Point #93 which is the other end of the Tri-System, and both times I attempted it, the mission completed itself without me ever seeing the Shuttles. But I did see some of the escorts in weird places, as I said.

EDIT: Distance glitch: Start at Petra and plot a course to Nav Point #145; it says it's 25 jumps away. But it's not - it's 24. Press R to rotate the map until you can see #145 and SS:Curium (#150) next to it in the top right corner. Click on SS:Curium and it says 23. Now, SS:Curium is next to #145, therefore Petra to #145 is 24 jumps, not 25 - and the game hasn't found the shortest route! I wonder why this happens in this case?

I also worked out that when you're landed at RS:Bestinium, any distance calculations when using the PAD's Diary appear to be calculated from RS:Felos instead, for some reason. But it corrects itself when you take off and look at the diary from space.

EDIT 2: I so rarely use missiles that I finally decided to change my default loadout to 6x Hell and a Banshee in the last slot. As before, I can fire two at once if necessary - e.g. against a Prototype I can queue up a Hellraiser and Banshee to fire together. I rarely need more than 6 Hellraisers in a single launch, and I rarely need missiles - Proximity are the only ones strong enough to deal with most enemy fighters, and I can fit a few if a mission requires it. Other than that, I'll stick to Hellraisers and a Banshee, or 7 Hellraisers if necessary.
 
Last edited:
New method for Hermes Lumber - Part B (Rocking Hairpigs): Drop the hairpigs in Hermes local space, then pick them back up again. Jump away, and the mission completes. I think the way the mission works is Hermes local space has to be clear of other ships, completely (not just enemies but everything). It's probably an oversight. But since you've dropped the hairpigs, that part of the mission is complete, and since you've picked them back up, they aren't removed from the game when jumping, making the game think they've been destroyed and failing the mission. So this way works nicely if it doesn't complete straight away when you drop them.

As for my previous post about missiles, there is one time I do like to use a couple of missiles, and that's during the Kiowan High Council SOS mission. You have to destroy three Skulls before they destroy a stranded Vector, and two of the Skulls go straight for the Vector. If they fire missiles, it's usually all over. There often isn't enough time to get both Skulls with just guns, so I fire a missile at each of the Skulls. Proximity or Python both work fine; both are strong enough to destroy a Skull, but I prefer Proximity because they're cheaper and don't need to be quite as accurate. (Plus they're twice as strong, which isn't relevant here but a single Python won't destroy most enemy fighters, whereas a single Proximity will.)
 
I went through the mission list just a few hours ago. There are exactly 100 BBS missions, not including later parts, so 100 either complete or Part A. I count 59 plus 6 (DARKFIX only) or so that I've actually seen in actual gameplay. Funnily enough, most of the ones I've never seen are consecutive. Most missions are available on both versions but some are DARKFIX only, it seems.

In MISSION0.TXT, I've seen the first 7 out of 10.
In MISSION1.TXT, I've seen numbers 3, 5 and 6 (both versions), and 10 (DARKFIX only).
In MISSION2.TXT, I've seen 3 and, once, 6 (DARKFIX only).
I haven't seen any from MISSION3.TXT.
As for MISSION4.TXT, I've seen 2 and 9 (both DARKFIX only), and 10 (both versions).
5: 1, 2, 3, 5, 6, 7, 8, 9, 10 - 3 and 5 appear to be DARKFIX only. 7 is very glitchy and only possible if you land after Part A (scanning the Lumber Monolith) which skips Part B. Then Part C awards 13,500 Credits instead of 2,700. Try and do it properly and it will never complete. I don't know why, but upon doing Part B, the cargo pods move at 400 instead of 200, and the four Military Lights (ID: ENVIRO SUITS) don't spawn.
6: Seen all. 5 is Infected Humanists, and I've now done it on my main file, rare though it's been recently - but it was common last playthrough. Given its high reward (16,000 Cr), it's pretty hard and I'd recommend avoiding it until you're strong. Even a Freij Mk II with top equipment will struggle - the crossfire from all the turrets can be hellish, but it's not impossible with strategic use of Warp Shields and BSE Mk II. Remember that you can land if necessary after Part A, and technically you don't have to destroy everything after Part B starts; the only requirement is to destroy the Infected Humanists at Nav Point #12. Also, one Monolith during Part A is "INFESTED HUMANISTS" with an S instead of a C. That particular ship is a trick: destroying it early IS a fail condition. 8 is glitchy and impossible without hacking at Part C (that's Davis Nerve Weapons). I think it's supposed to give you 7,000 Cr for doing Part A as that's what it says on the BBS, but you get nothing. You get 6,000 for Part B and 2,500 for Part C, if it worked properly that is.
7: Seen all. 6 is glitchy, and 7 Part B is glitchy (Rutger O'Malley and Conrad Bikunski). They both start straight away, even if you're nowhere near in the case of Rutger, and the mission can complete without you even doing anything. With Conrad, you have to destroy all the escorts and have visited #94 for the mission to complete. I find the escorts sometimes hang out where I destroyed the Military Transport (normally #200; I just wait there after Part A; it's safest to wait at #200 because if you kill it anywhere else you may anger the CIS) but I usually have to go away and come back, because only two of the escorts arrive and the other 5 are usually late. Then they just sit there and let me destroy them.
8: Seen all. 2 is worth 9,360 instead of 5,200 Cr. 5 angers the CIS till you next land, unless you destroy the Pant Parts cargo ship with mines or something, which is almost impossible. I don't know if it's because the ship isn't classed as an enemy vessel or if it's because I was releasing the mines too close to it - maybe they don't work for a few moments after deployment. However, the Bernice mission's Businessman is classed as a non-enemy ship (no red bar at top before you attack it) - it attacks you though, and mines do work on it to avoid angering the CIS by not giving you credit for the kill. Of course, as it's shooting at you, if you're flying away from it and it's targeting you from behind, it's almost guaranteed to fly straight into the mine. The Pant Parts ship just flies straight so getting the exact position right is a major headache. I think it's best simply to accept that you'll likely anger the CIS, so do this mission last thing before landing nearby; it's only a few jumps to Karatikus or Petra. (If you encounter a Military Destroyer whilst the CIS is angry, I recommend ignoring it; leave it alone and it may jump away, and if there are no more enemies in the area, just fly away from it until it goes EXTREME or disappears.) I don't think you can use a wingman to kill it without angering the CIS but I'll try it next time. (No, you can't. The CIS still get angry.)
9: Seen all. Nothing out of the ordinary.

So that's about 59-65 missions I've seen, out of 100.

If I had to speculate, I might guess that missions are assigned a difficulty, and when you're at the hardest difficulty level, maybe missions classed as easier are less likely to be offered. This is just a guess and I haven't run any tests. There are plenty of very common missions at my current level that are very easy, though, so I may be completely wrong here. I might start a new game and see if anything's different while I'm at a much lower level.

This is just an interesting aside, but in Lin's editor, mission numbers are multiples of 4 (with intermediate numbers being later parts of that mission, if there are later parts); SOS missions end at 64 and BBS missions start at 72. If you manually enter 68 into the BBS as a mission, it acts as a copy of the first SOS mission with the Unknown Ship (Talon), except all the emails and diary entries are blank.

EDIT: At some point I'll set up a file to test every mission. I don't like editing too much unless I'm testing things, but I don't mind setting up the BBS so that I can test the missions. As far as I know, it doesn't matter what's available on the BBS - the parameters are randomly set regardless of whether it's a Cargo Ship, Wingman or Mission, and if you leave them as they are, the missions should work as normal, as if they were available on the BBS sans editing. (Parameter 1 is the one that determines whether the BBS entry has been accepted. It's 0 if not, 2 if so. As far as I worked out, RAND NAV #1-#3 is Parameters 7-9, and RAND PLANET #1 is Parameter 10 (Index number, not Nav Point).

I don't know what the other parameters mean. Maybe they determine other semi-random mission behaviour, maybe the number of landouts per mission part (which may not be fixed; the guide is wrong in many cases where it says Landouts 0 but you can land once or twice without failing - the number of landouts generally resets when the next part of a multipart mission starts so there may be a few parameters for this; one for each part - but this is speculation), maybe one parameter determines which pilot picture is used for a BBS-hired Cargo Ship (and if you hire a Gea Transit from the Commodities screen, maybe it uses a fixed default; in this case if a Gea is on the BBS, it marks it as hired but I don't know if it uses the BBS Gea's parameters; if two identical Cargo Ships are on the BBS, hiring one will mark them both as hired but you're only hiring one, and I imagine it uses the parameters of the one you selected), and maybe some are unused.

There's a lot I don't know, and even the people who wrote the editors had a lot of stuff they didn't fully understand, hence the Unknown tab and fields as well as the parts of the save files you can't edit with the editors. Over the course of my recent playthroughs and tests, I've worked out some stuff which I've put in this and a couple of other threads, and I hope it's useful. But my biggest hope for this game is for someone to actually go through the source code and answer some of the mysteries, such as what's going on with Louissa Phillips Part B and why Davis Nerve Part C doesn't work properly when it's a continuation from Part B, but it does if Part C is manually added to the BBS - at the moment my theory is that the ships supposed to be generated don't work properly in flight, but if the mission is started from land, it's initialised differently and works correctly.
 
Last edited:
One more incredibly useful trick that I only recently (in the last week or so) worked out: Don't waste afterburner fuel. Remember that afterburner fuel is used at a constant rate while TAB is being held, no matter how fast you're going. So try to remember not to afterburn from below maximum speed (although it's not a massive deal, and if you already have a finger over TAB but not near ] sometimes I just hit TAB, especially if I used X to match speed and I'm not that far below max). Ideally you only want to be using afterburner fuel when ACCELERATING.

How do you do this? Simple. Hold TAB until you hit max afterburn, then let go and start mashing TAB. Freij Mk II + Afterburner Enhancer Mk III gives a top afterburn of 1144, so when you hit 1144, holding TAB is a waste as you can't accelerate any more. If you release TAB, your speed will start to drop of course, but if you press it again straight away, it won't have time to drop more than a small amount. By mashing TAB when at 1144, you'll be travelling at almost the same speed as holding TAB but you'll use HALF the afterburner fuel.

Don't afterburn into a system jump gate. You can use the same method whilst approaching it until it's quite big on the screen but not enormous (with practice you'll know how big the circle needs to be, roughly), then let go of TAB completely. If you got the distance right, your speed will drop to the regular max (440 in a Freij Mk II) just before hitting the gate.

If you're going to use the afterburner at all, short bursts where you only gain a bit of speed over the normal max and don't get near the afterburner max are inefficient. Still, sometimes I do this if I'm behind a fast ship like a Skull or the smaller Military Heavy and it's getting too far in front. This is because as long as you don't let it get too far ahead, it won't turn round and try to charge you with lasers firing; it'll just fly forwards with a bit of bobbing and weaving, making it fairly easy to shoot without having to dodge its incoming fire. But if you're only using the afterburner to get somewhere more quickly such as a planet or a ship some distance away, the most efficient way to use your fuel is, as I mentioned before, mashing TAB once you're at maximum burn then slowing to regular max before reaching it, so you aren't wasting fuel overshooting it and having to turn round!
 
Before, when I was explaining how I fixed the Davis Nerve Part C by hex editing, I think I noticed this but didn't realise the significance straight away. When a mission advances to a later part (this applies to missions listed in the guide as single-part missions too; it's if the diary entry changes I think, and maybe if an email arrives though this is less certain, as timed events such as emails and ships jumping in seem to be in the PUSH section of the save file with hex 86 00 in place of the ship number or FF FF for something destroyed or removed, and I still don't fully understand how it works), it's possible that its position in the diary and active mission order may change. As I said before, hex search for 00 02 00 FF FF for entries related to the first BBS/SOS mission, with 03 and 04 instead of 02 for the second and third. 01 is for cinematic missions, and harder to search for because of other matches, 00 00 00 FF FF is for main plot missions.

So since this number can potentially change between mission parts (or maybe the whole PUSH section is tidied up upon certain events such as landing, completing a mission (or part), accepting a new mission or other unknown factors, I think the best way to fix this via hex editing is as follows: If you see Davis Nerve mission and want to do it along with attempting the fix, I recommend only accepting it while no other missions are active, and this includes main and cinematic ones. Ideally Diary Page 1 wants to be Loose Ends and Page 2 wants to be No Entry Available. (or one of the other entries that lingers after the end of a mission, depending on which one you did last). Otherwise, there may be something in the PUSH section relating to a main or cinematic mission, or based on a certain amount of time passing such as the Dr Loomis or Hassan after Rhinehart email. It may be OK if not all cinematic missions have been offered, but as it may potentially cause complications, this is why I recommend only doing this after everything else is done.

Now, if nothing is on a timer and no other missions are active, accepting the Davis mission will add entries right at the start of the PUSH section. Before accepting the mission, you want to go into Lin's editor, load a COPY of your save and change the mission number from 340 to 342. Make NO other changes. The copy needs to be in a slot accessible by the game, so name it GAME0?.IFF where ? is 0 to 9. It's probably easiest to put it in the slot just below your main file, so if your main file is in the top slot (GAME00.IFF), put it in the second slot (GAME01.IFF). Load the copy, accept the mission (which won't have a description in the BBS as it's Part C) and immediately save it again in the slot you're using for the copy (second slot in my example). You may change the descriptive name but keep it the same length (as length affects offsets).

Now, you have the source file you'll need to fix your main save when you reach Part C. Keep this as it is for now and load your main file ingame. Accept the Davis mission, and if you want to accept any other missions, you can do so. However, you should only complete Part B when no other missions are active, so that Part C goes into the first BBS/SOS mission slot (02). You can get away with not doing this, but it may mean the mission ends up in a different slot, complicating matters as I found before. I can't be sure without testing whether it matters if Part A is accepted or Part B is completed with no other active missions, but I would assume only one of these things actually matters here. As I'm unsure which one, do both and it should ensure the correct slot. Better to be safe while we don't know the full inner workings of the mission system.

So once Part B is complete and no other missions are active, land and save before going to the Nav Point for Part C, and don't accept any more BBS missions yet. At this point the fix needs to be applied, so load both saves into a hex editor. It's a good idea to check the PUSH section of your main save, to make sure the entries near the start are for the first BBS/SOS slot (00 02 00 FF FF). There should be ship ID numbers preceded by 15 00 and 16 00, which are Duresses and Heretics, and the 00 02 00 FF FF should be nearby. If it's 03 or 04, remember this. However, if you accepted the mission with no other active missions, and if you completed Part B with no other active missions (assuming both these things matter here; maybe only one is important but I don't know; it would need testing), I would hope that this paragraph won't be necessary and it'll always be in the correct mission slot. But until we know more, better to check and be safe.

Find the PUSH section in the copy, the file prepared earlier. In my example the P of PUSH was at byte 2CC and I copied from 2CC to 3851 (hex). It's hex 3585 or decimal 13,701 bytes that need copying. If the number in the previous paragraph was 03 or 04, you should change all 33 occurrences of 00 02 00 FF FF in that section to the number in question. It doesn't matter whether you do it in the copied file before copying the section, or the main file after pasting the section. Paste the section in the main file starting at the P of PUSH, and make sure you OVERWRITE what's there, keeping the file length the same. Some hex editors make this more difficult than it needs to be, and you may need to select the same number of bytes before pasting the section to overwrite rather than insert. Now the hard part should be over, and assuming everything was done correctly, your main file will be on Part C of the Davis Nerve mission and it will work correctly; you should even be OK accepting more missions without any problems.

I've never been great at technical explanations, and I probably made things more complicated than they needed to be, but I hope it helps. The hex editor I used was HxD, but there are probably better ones.
 
Last edited:
A few more mission glitches; one major, three minor.


Major glitch: If you go to Karatikus, Nav #0 and destroy the six Kiowan ships before going to Nav #25, if the Ogans jump, instead of going to #0 they disappear (and the mission doesn't automatically fail until you land a few times). If you avoid #0 before going to #25 and they jump, they will be at #0. I don't know why, but clearing out #0 stops the ships jumping there when they leave #25.


Minor glitch: Normally, Cravien's Military Destroyer is stationary. If you use a BSE against it to stop the turrets firing, when it wears off, the Destroyer will start moving at 240. This doesn't really matter much unless you were planning on using a torpedo, which travel at a max speed of 200 so will be outrun if fired from behind the Destroyer. Still, once everything else is dead, it's easy enough to get into a blind spot to kill Cravien. This glitch may occur in other situations with stationary ships.


Minor glitch: Sometimes an enemy fighter can start attacking a Papogod Cruiser. I think the Cruiser is set wrongly because it doesn't use its turrets when you shoot it, even though the other one does.


Minor glitch: The Kiowan Cruiser is wrongly set as an enemy ship. Sometimes your Kiowan allies can attack the Kiowan Cruiser, thinking it's an enemy. Once the mission is complete, you either have to fly a long way away or just destroy the Kiowan Cruiser to be able to jump away. Still, it's an extra 500 Credits. Once I've destroyed the Papogod fighters, I usually take out the Kiowan fighters for the extra 50 Credits each and to stop them doing stupid things like destroying their own cruiser.
 
The RNG generation seems off. Sometimes the DOSBox version generates several of the same civilian ship, like around 6 Freij Mk IIs and no other types of civilian ships. I have a feeling the mission selection suffers from poor RNG, resulting in often seeing the same missions repeatedly. The DARKFIX version seems to be slightly less bad - I've seen rare missions occasionally, including https://www.wcnews.com/wcpedia/CIS_HQ_Heavy_Fighter_Mutiny and https://www.wcnews.com/wcpedia/Gaffney_Medi-Corp . Maybe they can be offered in the DOSBox version but I don't know. Needs more testing.
 
Now I have an X360 pad so I started playing the DARKFIX version again, and it seems it can offer different missions. Most of them are the same, but some of the missions that seem either extremely rare or nonexistent on the DOSBox version have been offered. I'll experiment some more.

EDIT: My main laptop recently suffered a keyboard problem, so I had to use a slower (but newer) laptop for a while. The performance was terrible, and I resorted to some of the DOSBox tweaks I mentioned above to get better gameplay, such as changing cpu from normal to dynamic. This was unstable but faster, and video cutscenes (including landing sequences but excluding animated sequences such as PAD and CCN Booth) had a high chance of crashing DOSBox. It was a severe crash and meant the game had to be closed via Task Manager, Sign Out or one of the Shutdown options. In addition, long periods of spaceflight sometimes caused the game to crash and force quit. I don't know if the dynamic cpu setting caused this; it definitely caused the video crashes though.

Given that the game was unstable on this second laptop, I don't know whether things would be different on other PCs, but there seemed something very off with the RNG generation. Sometimes hardly any ships would spawn, and other times there would be loads - it's been mentioned before about potentially getting stuck at a Nav Point due to enemy ships keeping arriving, but in my experience this hasn't happened. There seems to be a hard limit on the number of ships that can jump in, or maybe the number of separate times ship(s) can jump in. Whatever the case, after a while, there would be no new arrivals. A busy radar with a lot of red dots often wasn't as bad as it looked at first, because the pirates often attacked each other, or CIS ships if any were present; in many cases pirates assign a higher priority to CIS ships and tend to attack them first. However, not knowing the ins and outs of how the game's coded, I can't be sure about any of this or whether hard limits exist. I can only guess based on experience.

Other things that make me doubt the RNG: Sometimes the game generates neutral ships, which can be any of the 18 ships available for purchase and/or any of the 6 cargo ships that can be hired. (Not sure about the Monolith though; I don't know if I've seen any Monoliths randomly generated). But sometimes the game generates the same ship multiple times. I've seen six Freij Mk IIs at a single Nav Point, then two more at the next Nav Point. Sometimes there's a nice mix of different ships, and sometimes the same ship appears many times in a row. Then we have the missions: especially on the DOSBox version in my experience, the game can generate the same missions repeatedly. I don't mean two of the same mission at the same time, but after accepting a mission, the same mission can often appear very soon afterwards, such as the very next time you land, even if the first instance of the mission hasn't been started yet. If you accept two instances of the same mission, sometimes it works fine with double the number of ships and stuff, and other times it causes clashes - I remember the game generating both sets of friendly ships so close together that they were all touching each other, constantly draining shields. In that case it made things a lot harder, as there was only so much time before the ships were destroyed. In other cases there were no issues, such as when doing two copies of the Tri-System Hunters mission at the same time; if you can deal with twice the number of enemy ships, there's no problem.

Out of the 100 possible BBS missions, I saw 59 on my previous playthrough (DOSBox version). I'll keep track of the missions I see on the DARKFIX version on my main laptop, which is working again now, and I'll see which missions are offered and if there are any I've seen on DOSBox but not on DARKFIX. I'll update when I know more.

EDIT 2: I discovered a little trick a few weeks ago. If you hold P while landing on a planet or space station just before seeing the Customs / main landing screen, you will open the PAD before ever seeing said screen. This also works to let you save just before the Kappa Labs and Kronos cutscenes! It works on both versions of the game. Apart from that, though, this method will let you save the game before any of the time variables are checked, so the game won't check to see if new equipment or a new cinematic mission should be triggered. Since equipment bulletins can be lost if you save and reload after one is queued up, this is a way to save the game when new equipment is due but before the time checks are performed, making it less likely you'll miss the bulletin. On my current playthrough I'm trying to get all eight equipment bulletins and this trick helps here.

Saving at Kappa Labs is also very useful at that point in the story, because of the ambush immediately afterwards! Being able to save as you board Kronos's ship isn't quite as useful but it's worth knowing!

Last playthrough I did some missions many times; I prioritised missions I hadn't done yet on that file, but other than that I repeated a lot; I especially looked to repeat missions with good rewards that weren't too overly difficult and time-consuming. This time I'm taking a different approach: I'm going to avoid redoing missions as much as possible, with the exception that if the mission has a YES/NO choice, I'll do it twice, making the bad choice first then the good choice the second time. This way I won't be wasting time repeating missions when I'm trying to do as many different ones as possible!
 
Last edited:
Hi avengah,
I've recently noticed your amazing finds about Priv2 and also noticed that you figured out several bits in the savegame.
Could you write in a single post what kind of improvement suggestions and bugs you've found in my savegame editor?
e.g.
-what's the format for accepted missions (those 5 in the player log). How do you identify/find the offsets/bits in the savegame to change ships, their coordinates, type etc.
-what bits and where would i have to write to clear a bugged mission (so it's not occupying one of the precious 5 slots anymore)
-what could be done to make the story- and side- missions trigger better (Maybe there's something the editor could do to force-enable them upon next load?)

I don't wanna promise anything, but I might find some time and interest again to further improve the editor.
Anyway, great work. and thanks for using my editor.
 
Sorry I missed your post before. I can't really help with the technical side of things other than what I've already posted above. I can't remember the offsets but you can find the offsets for diary pages by comparing saves before and after accepting missions. There are bytes that tell the game which diary entry to load. The editor fails to load a game if it's saved at the repair station near Kappa Labs, or if it's saved at Kronos's Ship (which is possible if you hold P as you land).

I'm not sure how to completely clear a bugged mission out of a save so the diary and spawns are all clear but there is a huge part of the save dedicated to spawns for the various missions which I described above. For that three-part Davis mission (340), the third part works correctly if it's started directly from the bulletin board by editing the 340 to 342, so I did that, then went back to my original save and completed it normally up to the third part of the mission, then copied the spawn pointers across from the first edited save. I would only do this after all the main plot and cinematic stuff is done to avoid breaking anything, and I'd want this to be the only mission active to avoid causing other problems. Although if the edit is done successfully, you are probably OK accepting more missions after doing the edit.

Setting the location to Karatikus in the editor is broken. You have to manually change the Scene No. as well, to 25 or something like that. Sorry I can't be of much more help as it's been a while. I hope what I wrote above helps you.
 
Last edited:
Back
Top