F-109 Vampire model

Adm_maverick

Rear Admiral
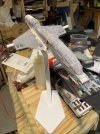
I decided to something crazy and I took the Vampire figure from Thingverse, and upscaled it to produce a roughly 14" long model. Now because of the size of my resin printer, I had to break the model down into segments.

But then I also took a step further and wanted to make the engines rotate. So those needed to be separate parts, and the wing pylons needed to be modified to allow the rotation.

But then I decided to make it even more involved and chose to install lights in the engines.

So crazy enough? Well here is a record of my progress:
IMG_3534.JPEG
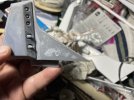
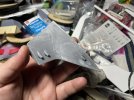
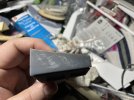
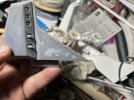
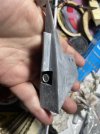
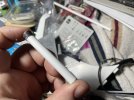
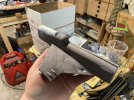
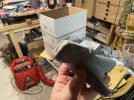
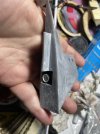
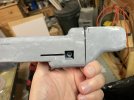
Here is the right wing pylon. It was the first part out of the printer. Clean up wasn't too bad.
IMG_3535.JPEGIMG_3536.JPEG

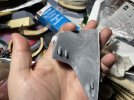
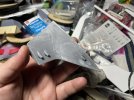
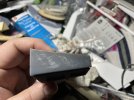
But there was some clean up needed. Resin printing is an annoying manufacturing process because it can be totally hit or miss with odd sections just being lost in the process. In this case I needed to fill some deformations and divots with modeling putty.
IMG_3537.JPEGIMG_3546.JPEG
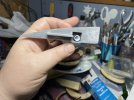
As I said, I wanted the engines to be able to rotate. In order to accommodate this desire, I redesigned the wing pylon to have a hollow section that I could then place a styrene tube into to serve as the rotation point.

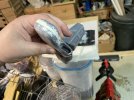
in order to accommodate the multi-part break down, I had to split the last third of the body into 2 parts. This put me in an odd spot. On the one hand, assembling 2 halve is pretty easy. But on the other hand just a straight split would split the inner details which would be hard to putty the divide.
So I removed the inner section and created an entirely new part:
IMG_3548.JPEGIMG_3547.JPEG

image.png
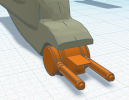
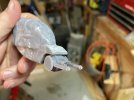
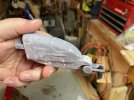
The nose cannons on the original model bugged me. It was just two little tubes. So I designed a new nose turret.
IMG_3565.JPEGIMG_3567.JPEG


IMG_3557.JPEGIMG_3560.JPEG
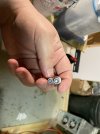
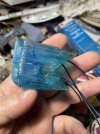
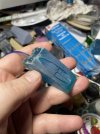
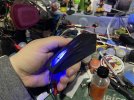
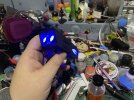
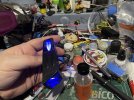
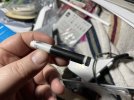
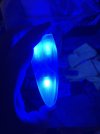
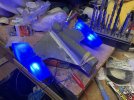
I printed the engine parts in blue resin to help facilitate the desired glow effect. I mounted 2 5mm LEDs behind the engine cones and 1 5mm LED in the forward section of the engine for the glowing part of the engine.
IMG_3564.JPEGIMG_3580.JPEGIMG_3582.JPEG
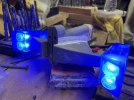
Tested the connections for the engines. Looks promising.
 
There comes a point in any project where you look at your in-progress work and you see the work coming together that you’re like “okay… this is looking friggen awesome!”Here is that moment with the Vampire model:

IMG_3602.JPEGIMG_3603.JPEG

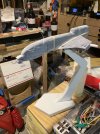
Covering up the light bleed through the resin is proving to be somewhat more problematic. What you see here is with 3 layers of acrylic paint and a layer or primer, and it still bleeds through.
IMG_3604.JPEGIMG_3605.JPEGIMG_3606.JPEG


More pics of the process:
IMG_3602.JPEGIMG_3603.JPEGIMG_3604.JPEGIMG_3605.JPEGIMG_3606.JPEGIMG_3534.JPEGIMG_3535.JPEGIMG_3536.JPEGIMG_3537.JPEGIMG_3538.JPEGIMG_3539.JPEGIMG_3540.JPEGIMG_3541.JPEGIMG_3544.JPEGIMG_3545.JPEG
 
Looking awesome, puts mine to shame.
Don't sell your model short. It looks really good. I think a lot of the problem with your is the limits of FDM printing. It's a trade off. SLA can do finer details, but it tends to be heavier and much easier to break. I had to print the nose of the Vampire 3 times because it cracked during printing or was knocked off the counter and shattered. FDM prints are lighter and more damage resistant but can't do as fine detail.

Though if you want to toss me a copy of the file for the Excalibur I'd be very grateful.
 
That one's linked in the thread I started for it, so please, feel free to have at it! The pilot and cockpit should look really good printed in resin.

It's broken into smaller components for printing and assembly, and built for the pieces to slide together, but you may want to divide up the larger block components into upper and lower halves to glue onto the wing, since I do not know how well the resin will behave with the potential stresses of slotting together.

My original Shapeways model was broken down quite a bit more, so this arrangement might work better. I expect you'll also need to break the wing along the centerline to print.

ss (2024-03-19 at 03.47.54).jpg
 
There comes a point in any project where you look at your in-progress work and you see the work coming together that you’re like “okay… this is looking friggen awesome!”Here is that moment with the Vampire model:

View attachment 13723View attachment 13724

Covering up the light bleed through the resin is proving to be somewhat more problematic. What you see here is with 3 layers of acrylic paint and a layer or primer, and it still bleeds through.
View attachment 13725View attachment 13726View attachment 13727


More pics of the process:
View attachment 13723View attachment 13724View attachment 13725View attachment 13726View attachment 13727View attachment 13728View attachment 13729View attachment 13730View attachment 13731View attachment 13732View attachment 13733View attachment 13734View attachment 13735View attachment 13736View attachment 13737
That looks awesome! :cool: - But it is big indeed ^^. How do you intend to color it? Via airbrush or how?
 
That one's linked in the thread I started for it, so please, feel free to have at it! The pilot and cockpit should look really good printed in resin.

It's broken into smaller components for printing and assembly, and built for the pieces to slide together, but you may want to divide up the larger block components into upper and lower halves to glue onto the wing, since I do not know how well the resin will behave with the potential stresses of slotting together.

My original Shapeways model was broken down quite a bit more, so this arrangement might work better. I expect you'll also need to break the wing along the centerline to print.

View attachment 13738
Broken down like this - you could actually sell it like a "normal" Resin-Kit ^^ I love it!
Could be a normal Resin kit now - like that Arrow-Resin-Kit that existested a few years back ...
 
Not that I want to diminish your "cinematic model" .. But I actually like Klavs' Excalibur a bit more, because it's smoother on the edges. Does anyone know if Klavs' Model can also be printed? - Does anyone of you have that print-file?
Would love to see the Excalibur next to my Hellcat ^^
 
I never printed it but I was working on his. It slices OK on a home slicer, but there were a number of issues like duplicate surfaces and flipped normals that could cause issues with commercial printing surfaces. It's a solid piece anyway, which would be prohibitive for print on demand costs.

Here it is if you want to take a look: https://drive.google.com/file/d/1GR9FN20Dw3L_D16ENsj7Q_s4SLBaxEjK/view?usp=drive_link
Scaled to 200mm length exactly (just now) so it might not be to exact scale with your Hellcat, I didn't calculate exact scaling to figure out size differences from one to another. It's solid as well, so it would be overpriced through on demand services.

Yell at me to take it down if this isn't OK, Klavs! And if its Ok with him, the CIC is free by me to use, since its Klavs model anyway, so feel free to upload the site along with the rest of the Fan Models hosted here! I actually have a pile of models like this I wanted to arrange as a sort of "Orbital Museum of STLs" for easy searching and less model reworking. Some of those assets intended for in-game use only take a bit of work to print!
 
Not that I want to diminish your "cinematic model" .. But I actually like Klavs' Excalibur a bit more, because it's smoother on the edges. Does anyone know if Klavs' Model can also be printed? - Does anyone of you have that print-file?
Would love to see the Excalibur next to my Hellcat ^^
Hah, not a bit, I love his interpretation as well, I want to say it's more "realistic" due to having the deeper layers of detail. I just went for a straight copy of the ancient graphics. ^_^

I know it's been printed before, since someone posted an example in the Excalibur thread, but I haven't tried it myself either. I want to think slicer software should be able to handle the weird faces for the most part, but I'm usually pretty careful about those as well.

What does get a little complicated is the "proper" scaling for the Excalibur. I went into a little detail in the other thread, but the official stated scales of some of the ships are a little wild, and don't quite mesh with how big the cockpits look. My "big" print is only a foot long, and I guessed it was about 1/72 from the size of the pilot that works. I'm not sure about the Vampire's size, but the nose size looks like it would fit a pretty large-scale pilot if you built a cockpit into it.

That's one reason I went for a bigger print, I actually built a cockpit into mine, and printed a canopy mold to heat some plastic packaging to make a clear canopy for it. The Vamp would be a bit trickier there due to the frame on the front, but it might be possible to print a frame and glue a transparent piece into it.

I have always loved the Vampire, so I might have to go grab that model and give it a shot myself.
 
  • Love
Reactions: 3ry
I have always loved the Vampire, so I might have to go grab that model and give it a shot myself.
I'd love to see it! I loved your Excalibur, and seeing how you broke it into pieces for model kit assembly was inspiring. I still haven't quite figured out how to do it so nicely, but I have been playing with the idea.


Adm_maverick clearly figured it out, this Vampire is HUGE thanks to the excellent use of sub-assembly pieces.

I intend to print out a bunch of the ships in as large scale as I can manage - imagine a Tiger's Claw 3 feet across!
As a part of my Wing Commander Star Fighter table top game I had the idea that if the mission involves capital ships, that the cap-ships would basically be the board. Which was fine... until I scaled the Midway for the game and found that it would have to be about 6 and a half feet long.

And then there was the Hvar'kann-class dreadnought which would be something like 70 feet, assuming I went with the 22 Km length that is.
 
Covering up the light bleed through the resin is proving to be somewhat more problematic. What you see here is with 3 layers of acrylic paint and a layer or primer, and it still bleeds through.
I was thinking of ways to address this besides just more/different paint layers and from a modeling perspective, hollowing out the inside (a common practice for resin prints anyway)and building in holes to fill the inside with paints, or resin... some material that can be poured inside to block light internally except where light piping is needed and modeled in.

This isn't really my idea, more an adaptation of the "solid object inside clear 3D print" idea thats been around a while. Heres a Formlabs discussion showing what I mean: https://forum.formlabs.com/t/injecting-materials-into-finished-clear-resin-print/23460/2
17a7950e41fd694f1ccd71d821907512f9d99cc9.JPG


The problem with just pouring in black resin is you would need to cure it inside after pouring or it may eventually cause the external surfaces to crack open as the inside cures slowly over an extended time, and dark resins that block liht will be hard to cure all at once so it would probably need to be done litle by little. And the whole time, the outside will be overexposed more and more as it needs to remain clear to allow the inside to cure. It would wind up looking burnt yellow by the time the inside is done, ruining any external surfaces intended to be actually clear.
 
Back
Top